
Do your headlights look cloudy, yellow, or just plain dull? If you can barely see the road at night, you are not alone. Many drivers deal with hazy headlights. This happens because sunlight and weather damage the plastic over time. It makes your car look old, and more importantly, it makes driving at night dangerous. You need good light to see obstacles and stay safe!
Choosing the right headlight cleaning kit or method can feel confusing. Should you buy a simple wipe, a full restoration kit, or try a home remedy like toothpaste? Each option has pros and cons. You might worry about spending money on something that doesn’t work or, worse, damaging your headlights even more. Nobody wants to waste time or money on a fix that fades quickly.
This post cuts through the confusion. We will show you exactly how to choose the best headlight cleaning solution for your car and budget. You will learn the simple steps to get crystal-clear headlights that boost your safety and your car’s appearance. Get ready to see the road clearly again!
Top Headlight Cleaning Recommendations

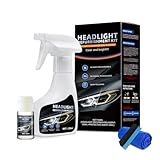
- KIT CONTENTS - Each headlight restoration kit includes (8) Step 1 Oxidation Removing Wipes, (1) Step 2 Sanding Kit, and (2) Step 3 Ceramic Coating Wipes.
- LASTS AS LONG AS YOU OWN YOUR VEHICLE! - This is a CERAMIC coating for cars that chemically bonds to your headlights and provides UV protection for as long as you'll own your vehicle.
- NO POWER TOOLS REQUIRED - Everything is included in the kit for your car. There are no tools required that could potentially damage your headlights or paint.
- RESTORES AND PROTECTS FROM UV! - Our CERAMIC coating wipes provide a layer of UV protection that will last as long as you own your vehicle. We believe in providing our customers the best products on earth, the first time.
- 3 EASY STEPS! - Cerakote's Headlight Restoration Kit is a simple, 30 minute process. Step 1: Our Oxidation Remover wipes remove stubborn oxidation. Step 2: Using our supplied sanding materials, remove any remaining deep oxidation. Step 3: Cerakote's industry leading ceramic restores the headlight to like-new!

- KIT INCLUDES: 1 - Disc Pad Holder, 3.25 in (8,2 cm) 6 - 3M Gold Sanding Discs 500 Grit, 3 in (7,6 cm) each 4 - 3M White Finishing Discs 800 Grit, 3 in (7,6 cm) each 1 - 3M Trizact Refining Disc 3000 Grit, 3 in (7,6 cm) 2 - 3M Quick Headlight Clear Co
- KITS CONTAIN masking tape, light sanding discs, wax protectant and more
- FOR USE ON plastic lenses – headlights, taillights, fog lights, directional lights and more
- 3M abrasive technology removes yellowing and buildup without damaging plastic lens surface
- Easy to use – choose a kit with no tools required, or for use with a common household drill

- KIT INCLUDES: 1 - 3M Trizact Refining Disc 1000 grit, 3 in/7.6 cm 1 - 3M Trizact Refining Disc 3000 grit, 3 in/7.6 cm 2 - 3M Quick Headlight Clear Coat Wipes 1 - Foam Pad with 3M Hookit Attachment, 3 in/7.6 cm 1- Disposable Glove
- FOR USE ON plastic lenses – headlights, taillights, fog lights, directional lights and more
- 3M abrasive technology removes yellowing and buildup without damaging plastic lens surface
- Easy to use – choose a kit with no tools required, or for use with a common household drill
- Save hundreds vs. replacing headlight lenses

- HEADLIGHT RESTORATION AND PROTECTION (GAP11516) – All-in-one formula cleans, restores, and protects plastic headlights, removing yellowing, oxidation, and haze for improved clarity and visibility
- RESTORES LIKE-NEW CLARITY – This headlight restorer quickly removes surface oxidation, light scratches, and embedded dirt, reviving headlight lenses to enhance nighttime driving safety and appearance
- LONG-LASTING PROTECTION – Leaves behind a durable headlight coating that acts as a protective barrier to help prevent future fading, discoloration, and oxidation from environmental exposure
- SAFE FOR MULTIPLE SURFACES – This car light cleaner works on plastic clear headlights, taillights, fog lights, and turn signals; safe for OEM and aftermarket lenses
- EASY APPLICATION – Apply the car headlight cleaner by hand or machine with a foam or microfiber applicator; buff to reveal a crystal-clear, restored finish in minutes

- Bright Roads Ahead - Bring your headlights back to life in minutes with an easy-to-use headlight restoration kit. Seal in long-lasting clarity using our headlight clear coat, helping you drive safely through dark roads, rainstorms, or foggy highways with confidence.
- Drive Safer with Every Swipe - Skip the shop and use our car headlight restoration kit to clear fog and oxidation fast. This car headlight cleaner delivers a sharp, polished finish while sealing in protection, all in minutes, all in your driveway.
- Save on Repairs - Our headlight restoration kit includes two cleaning wipes and one protective wipe. The powerful headlight polish removes haze, seals lenses, and helps keep your lights clear. It’s a simple way to restore visibility and upgrade your car’s look.
- Make Your Car Look New Again - Give your headlights a new glow with our premium headlight restore system. This easy-to-use headlight polishing kit quickly removes buildup, creating a UV-sealed finish that keeps your headlights clear in any weather.
- Keep It Clean and Clear - Wipe away dullness and grime using our car light cleaner, then protect the finish with our headlight coating. Your headlights stay crystal clear, and your car gets that polished appearance that lasts through daily use.

- Headlight Restoration Kit (GAP401) Restores cloudy, yellowed headlights and plastic lenses by removing oxidation, haze, and discoloration for a clear, like-new appearance.
- Improves nighttime visibility and driving safety by enhancing headlight clarity and increasing light output for better road illumination.
- Easy-to-use formula works by hand or machine to clean, restore, and protect headlight lenses without harsh abrasives or complicated steps.
- Leaves a protective layer to help guard against future yellowing and fading caused by exposure to sunlight, road grime, and the elements.
- Ideal for use on headlights, taillights, and clear plastic trim across all makes and models, making it a must-have for any detailing routine.
- Make Your Vision Brighter:This New Automotive Headlight Restoration Kits effectively clears up yellowing and cloudiness, shine your car headlamp in just minutes, instantly improving brightness and visibility
- Fast-Acting: This instant headlight oxidation removal spray works in minutes. This headlight cleaning kit quickly and easily resolves cloudy or yellowed headlights, saving you time
- Easy to Use: Simply shake 120ml of headlight restoration fluid, spray on your headlights, and wipe with a microfiber towel. No special tools or complicated steps are required, making this headlight repair kit easy for everyone
- Wide Compatibility: This headlight cleaning kit is suitable for both plastic and glass lenses on a variety of vehicle models, ensuring versatility for daily maintenance. This universal headlight restoration kit, suitable for all vehicle models, is a great addition to any car maintenance routine
- Lnstructions For Use: Step 1-Cleaning: Evenly spray the cleaner onto the headlight surface. Let it sit for 30 seconds, then wipe with a clean towel. Step 2-Rinsing: Thoroughly rinsse the headlight surface with clean water to remove all cleaner, then use a dry cloth to wipe away any water spots. Step3-Restoration: Squeeze an appropriate amount of crystal coating liquid onto the sponge applicator, wipe the headlight surface carefully in one direction to complete restoration.( Tip: when applying the coating liquid, do not scrub back and forth. Complete the wiping in a single pass in the same direction to protect the coating layer.)

- Restores Clarity & Enhances Visibility:This headlight restoration kit effectively removes yellowing, haze, and oxidation from headlight lenses. Helps improve nighttime visibility, giving your headlights a clearer and brighter appearance without the need for sanding or power tools.
- Effortless Spray & Wipe – No Power Tools Required: No sanding, no complex equipment. Simply spray the headlight cleaner and restorer onto the lens, then wipe clean with a microfiber towel. The quick, simple process saves time and effort—anyone can do it at home.
- Adds Hydrophobic Protective Coating: Beyond cleaning, this headlight polish and sealant leaves behind a hydrophobic layer that helps repel water, dirt, and road grime. The coating also adds a smooth, glossy finish that helps maintain that just-restored look between washes.
- Long-Lasting Results with Regular Use: Formulated to provide durable protection that holds up through routine driving conditions. When applied as directed, this headlight restoration kit helps extend the life of your restoration work, reducing the need for frequent reapplications.
- Versatile for Multiple Vehicle Types: Compatible with both plastic and glass headlight lenses across a wide range of vehicles—including cars, trucks, and SUVs. A practical choice for everyday vehicle maintenance and quick touch-ups.
Your Brightest Path: A Headlight Cleaning Buying Guide
Cloudy, yellow headlights make your car look old. They also make driving at night hard. Bright headlights keep you safe. This guide helps you pick the best way to clean them up.
Key Features to Look For
When buying a headlight cleaning kit, look for these important things:
1. Restoration Level
- Surface Cleaners: These are easy sprays. They remove light dirt and haze. They do not fix deep yellowing.
- Restoration Kits: These use sanding and polishing. They remove heavy oxidation. Look for kits that promise long-lasting results.
2. UV Protection Included
Headlight plastic fades because of the sun (UV rays). A good kit must include a UV sealant or clear coat. This protects your hard work. Without it, the headlights will turn yellow again quickly.
3. Ease of Use
Some kits require power tools. Others only need elbow grease. Choose a kit that matches your comfort level. Kits with simple wipes or rubbing compounds are often easier for beginners.
Important Materials in Your Kit
The things inside the kit matter a lot. They determine how well the cleaning works.
Abrasives (For Heavy Damage)
Restoration kits use sandpaper or sanding pads. These remove the old, damaged plastic layer. Check the grit sizes. Good kits include fine grits (like 1000, 2000, 3000) to smooth the surface perfectly.
Polishing Compounds
These compounds buff out the tiny scratches left by sanding. Look for high-quality plastic polish. This makes the lens crystal clear.
Protective Sealants
The sealant is the final shield. Some kits use a liquid wipe-on sealant. Others use a spray-on UV coating. Ensure the sealant is durable.
Factors That Improve or Reduce Quality
What makes a kit great or terrible?
Quality Boosters
- Multiple Steps: Kits with 3 or 4 clear steps usually give better results. More steps mean more thorough cleaning.
- Good Applicators: Soft microfiber cloths prevent new scratches. Sturdy sanding blocks help you apply even pressure.
Quality Reducers
Cheap kits often skip the final UV protection step. If a kit is very cheap and only has one small bottle of liquid, it probably won’t last long. Also, kits missing fine-grit sandpaper will leave a hazy finish.
User Experience and Use Cases
How you use the product affects your success.
User Experience
If you use a kit that requires a drill attachment, make sure you have a drill you trust. If you use a manual kit, be ready to rub hard! Read reviews to see if users felt the instructions were clear. Clear instructions make the whole process much smoother.
Use Cases
- Light Haze: If your headlights just look a little dull, start with a simple plastic cleaner spray.
- Severe Yellowing/Cracking: If the plastic is very yellow or slightly pitted, you must use a full sanding and polishing restoration kit. This takes more time but gives a like-new look.
- Preventative Care: After restoring your lights, use a UV spray every six months. This prevents the plastic from breaking down again.
Headlight Cleaning FAQ
Q: How long does a headlight cleaning usually take?
A: A quick surface clean takes about 15 minutes. A full restoration kit that includes sanding takes one to two hours. You must work slowly for the best results.
Q: Can I use toothpaste to clean my headlights?
A: Toothpaste acts as a very mild abrasive. It might remove very light haze. However, it is not strong enough for real yellowing and does not offer UV protection.
Q: Is it safe for me to sand my headlights?
A: Yes, it is safe if you follow the instructions. You are only sanding off the damaged, faded layer of plastic. You must use water and the correct sandpaper sequence.
Q: Do I need to remove the headlights from the car?
A: No, most kits are designed for the headlights to stay on the car. You only need to tape off the paint around the light to protect it from sanding dust.
Q: How long should the restored headlights last?
A: If you use a high-quality kit and apply a good UV sealant, the results can last from one to three years. Sunlight exposure greatly affects this time.
Q: What if the kit doesn’t come with UV protection?
A: If the kit skips the UV coat, you must buy one separately. Without it, the headlights will turn yellow again very fast, sometimes within a few weeks.
Q: What is ‘oxidation’ on my headlights?
A: Oxidation is when the plastic breaks down due to sun, heat, and weather. It makes the plastic look cloudy, yellow, or foggy.
Q: Can I use regular car wax instead of a special sealant?
A: Regular car wax offers very little UV protection for headlights. You should use a product specifically made to protect polycarbonate plastic from UV rays.
Q: My headlights look clear but feel rough. What did I miss?
A: You likely skipped or rushed the finer sanding grits. The roughness means you need to go back to a finer sandpaper (like 3000 grit) and then polish thoroughly.
Q: Are electric buffer attachments better than hand polishing?
A: Electric buffers make polishing faster and often smoother. However, you must use very low speeds and light pressure. Too much speed can overheat and warp the plastic.