
Can you get Apple CarPlay in an older car? Yes, absolutely! You can easily bring the convenience and modern features of Apple CarPlay to your older vehicle through a CarPlay retrofit. This blog post will guide you through everything you need to know about adding CarPlay to your older car and how to install CarPlay.
Many drivers love their older cars. They might be classics, reliable workhorses, or simply cars they have a strong emotional connection to. However, the lack of modern infotainment features, especially smartphone integration like Apple CarPlay, can feel like a significant drawback. The good news is that you don’t need to buy a new car to enjoy iOS in car functionality. Aftermarket CarPlay solutions offer a fantastic way to upgrade your driving experience. This guide will demystify the process, from choosing the right solution to getting it up and running. We’ll explore various methods, including CarPlay adapters for older cars, how to connect iPhone to car radio, and the difference between Bluetooth CarPlay and wired CarPlay, ultimately making CarPlay integration older vehicles a reality.
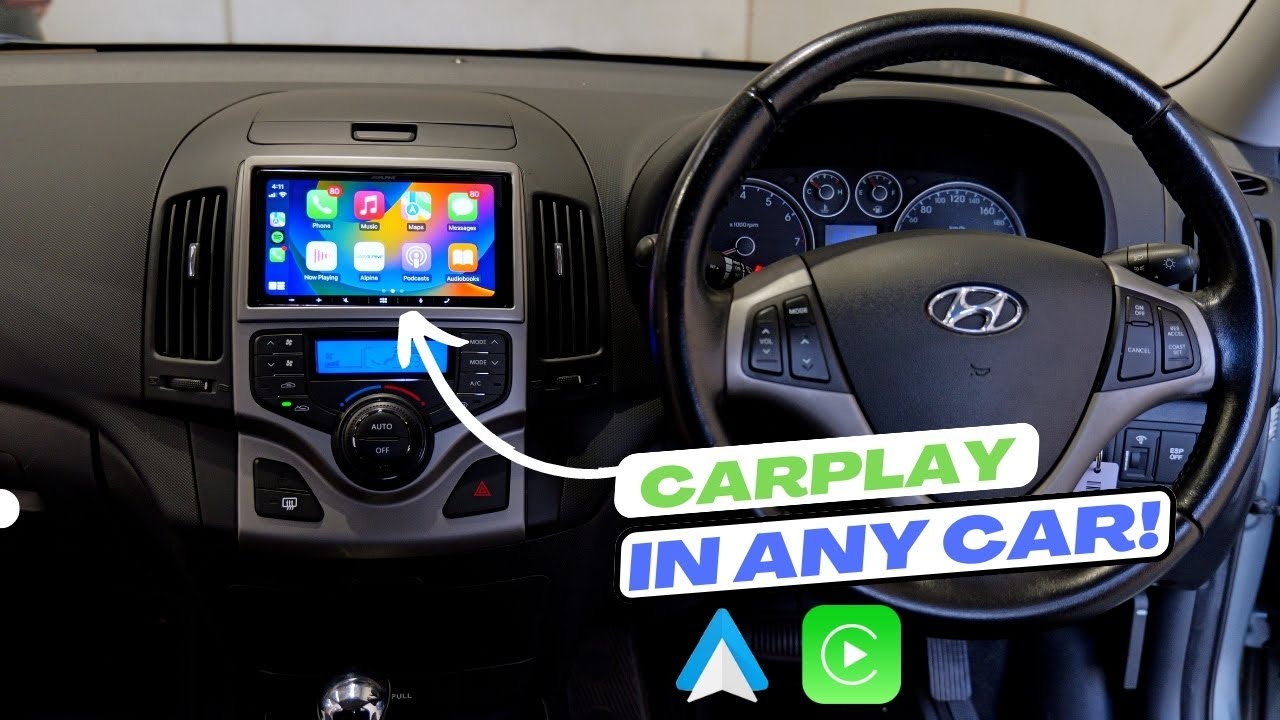
Image Source: i.ytimg.com
Why Bring CarPlay to Your Older Car?
Before we dive into the “how,” let’s talk about the “why.” CarPlay transforms your car’s dashboard into an extension of your iPhone. It’s designed for safety and convenience, allowing you to:
- Access Navigation: Use familiar apps like Apple Maps, Google Maps, or Waze for real-time traffic updates and turn-by-turn directions.
- Make Calls and Send Messages: Safely make calls and send texts using voice commands through Siri, keeping your hands on the wheel.
- Enjoy Music and Podcasts: Stream your favorite music, podcasts, and audiobooks from apps like Spotify, Apple Music, and Audible.
- Control Apps with Voice: Use Siri for a wide range of tasks, from setting reminders to checking the weather.
- Enjoy a Familiar Interface: The CarPlay interface is intuitive and designed to be used easily while driving, with large icons and simple menus.
For older cars, which often lack built-in advanced infotainment systems, CarPlay can be a game-changer. It modernizes the driving experience without compromising the character of your beloved vehicle.
Decoding Your Options: How to Add CarPlay to an Old Car
There are several effective ways to achieve CarPlay integration older vehicles. The best option for you will depend on your car’s existing audio system and your budget.
Option 1: Aftermarket CarPlay Head Units
This is the most comprehensive and popular method for a full CarPlay retrofit. An aftermarket CarPlay head unit is essentially a new stereo system designed to replace your car’s existing one.
What is an Aftermarket CarPlay Head Unit?
These units are modern infotainment systems that come equipped with built-in Apple CarPlay compatibility. They offer larger touchscreens, improved sound quality, and a host of other features beyond just CarPlay.
Benefits of Aftermarket Head Units:
- Seamless Integration: They provide a factory-like look and feel once installed.
- Enhanced Audio: Often come with better amplifiers and audio processing capabilities.
- Additional Features: Many include backup camera support, Android Auto, Bluetooth, USB ports, and more.
- Modern Aesthetics: Sleek designs that can significantly update your car’s interior.
Types of Aftermarket Head Units:
- Single-DIN: These are smaller units, typically about 7 inches in screen size. They are compatible with a wider range of older cars that may not have space for a larger unit.
- Double-DIN: These are larger units, usually around 7 to 10 inches. They offer bigger screens for a more immersive CarPlay experience but require more space in the dashboard.
- Floating Display Units: These units feature a large screen that “floats” above the dashboard, allowing for easier viewing and a less invasive installation, especially in cars with unique dashboard designs.
What to Look For in an Aftermarket Head Unit:
- CarPlay Compatibility: Ensure it explicitly states Apple CarPlay support.
- Screen Size and Resolution: Choose a size that fits your dash and your preference for clarity.
- User Interface: Look for reviews on ease of use and responsiveness.
- Connectivity: Check for USB ports (for wired CarPlay), Bluetooth, Wi-Fi.
- Audio Features: If sound quality is important, look for features like equalizer settings and pre-amp outputs.
- Car-Specific Kits: Many companies offer vehicle-specific mounting kits and wiring harnesses, making installation much easier and cleaner.
The Installation Process:
Installing an aftermarket head unit involves removing the old stereo and connecting the new one. This can range from a simple plug-and-play affair with the right kits to a more involved process requiring some basic wiring.
Step-by-step (General):
- Gather Your Tools: You’ll need a dashboard removal tool kit, screwdrivers, wire strippers, crimpers, and electrical tape.
- Purchase Necessary Kits:
- Dash Kit: This adapter plate fills the gap between your car’s dashboard opening and the new head unit.
- Wiring Harness Adapter: This plugs into your car’s factory wiring harness and provides standard connections for the new stereo, avoiding the need to cut and splice factory wires.
- Antenna Adapter: If your new unit has a different antenna connection.
- Steering Wheel Control Interface: If you want to retain your steering wheel audio controls.
- Disconnect the Battery: Crucial for safety to prevent electrical shorts.
- Remove the Old Stereo: Carefully use dash removal tools to pry off trim panels and access the stereo mounting screws.
- Wire the New Head Unit: Connect the wiring harness adapter to the new head unit’s harness. If you have a steering wheel control interface, wire that in as well.
- Mount the New Head Unit: Install the new head unit into the dash kit.
- Connect and Test: Plug in the wiring harness, antenna, and any other cables. Reconnect the battery and test all functions (sound, CarPlay, Bluetooth, etc.) before fully reassembling.
- Reassemble: Secure the new head unit and reinstall trim panels.
Table: Aftermarket Head Unit Comparison Factors
| Feature | Single-DIN | Double-DIN | Floating Display |
|---|---|---|---|
| Screen Size | Smaller (approx. 7 inches) | Larger (approx. 7-10 inches) | Largest (often 9-10 inches), adjustable angle/height |
| Dashboard Space | Fits smaller openings, more universal fit | Requires larger dash opening | Minimal modification needed, often mounts over dash |
| Installation | Generally simpler | Can be more complex due to size | Can be simpler, but mounting can be tricky |
| CarPlay Experience | Functional, but smaller screen | More immersive, easier to see details | Most immersive, excellent visibility |
| Cost | Typically lower | Mid-range | Often higher |
| Commonality | More common in older cars | Becoming standard in newer cars | Trending in aftermarket upgrades |
Option 2: CarPlay Adapters (Wireless or Wired)
If replacing your entire head unit seems too daunting or expensive, a CarPlay adapter for older cars is an excellent alternative. These devices plug into your existing car stereo and enable CarPlay functionality.
What is a CarPlay Adapter?
These are small, often dongle-like devices that connect to your car’s USB port and your iPhone. They then broadcast the CarPlay interface, which can be displayed on your existing car radio screen (if it has a display) or through a separate screen.
Types of CarPlay Adapters:
-
Wired Adapters:
- These adapters require a USB connection to both your car and your iPhone. They are generally simpler and often more stable in their connection.
- How they work: You plug the adapter into your car’s USB port, then connect your iPhone to the adapter via a USB cable. The adapter then allows your iPhone to communicate with your car’s audio system.
- Requirement: Your car radio MUST have a USB port that supports data transfer (not just charging). Many older cars with factory-installed stereos have USB ports for this purpose.
-
Wireless Adapters:
- These offer the convenience of Bluetooth CarPlay or Wi-Fi CarPlay without needing a cable to connect your iPhone.
- How they work: You typically connect the adapter to your car’s USB port. The adapter then creates a Wi-Fi hotspot. You connect your iPhone to this Wi-Fi, and then pair your iPhone via Bluetooth for the initial setup. Subsequent connections are usually automatic.
- Requirement: Your car radio MUST have a USB port that supports data transfer. The adapter also needs to broadcast its own Wi-Fi signal, which your iPhone connects to.
-
All-in-One Screen Units:
- These are more advanced adapters that come with their own screen. They offer a complete CarPlay solution that can be mounted on your dashboard or windshield.
- How they work: They typically connect to your car’s 12V power outlet or cigarette lighter. They can then transmit audio to your car radio via an FM transmitter or a direct AUX cable connection.
- Benefits: No need to replace your existing stereo. Easy installation. Can be moved between cars.
- Drawbacks: Audio quality might be slightly compromised compared to direct AUX or USB connection. The separate screen might not match your car’s interior aesthetic.
How to Connect iPhone to Car Radio using an Adapter:
-
Wired Adapter:
- Plug the adapter into your car’s USB port.
- Connect your iPhone to the adapter using a USB cable.
- Your car’s infotainment system should automatically detect the connection and prompt you to use CarPlay. If not, look for a “CarPlay” or “USB Device” option in your car’s media menu.
-
Wireless Adapter:
- Plug the wireless adapter into your car’s USB port.
- On your iPhone, go to Settings > Wi-Fi and connect to the Wi-Fi network broadcast by the adapter (the network name and password are usually on the adapter or in its manual).
- Go to Settings > Bluetooth and pair your iPhone with the adapter’s Bluetooth signal.
- Once paired, your car’s display should show the CarPlay interface.
Key Considerations for Adapters:
- Car’s USB Port Functionality: Crucially, the USB port in your car must support data transfer, not just charging. Many older cars have USB ports that are only for charging, which will not work with these adapters. Test this by plugging in a USB drive with music files; if your car can read them, the port likely supports data.
- Screen Compatibility: If you’re using an adapter that relies on your existing car radio screen, ensure your car radio has a screen that can display an external video source or has a specific “CarPlay” or “Mirroring” mode. Some basic car radios without screens will not work with these types of adapters.
- Sound Output:
- AUX Input: The best way for adapters to send audio to your older car is through an AUX (auxiliary) input jack. If your car has one, connect the adapter to your car’s AUX port using an AUX cable.
- FM Transmitter: Some adapters (especially standalone screen units) use FM transmitters. This involves tuning both the adapter and your car radio to the same FM frequency. The sound quality can be variable and subject to interference.
- Bluetooth Audio: Some adapters transmit audio over Bluetooth after the initial pairing. This is convenient but can sometimes introduce slight audio latency.
Popular Adapter Brands:
- Ottocast
- Carlinkit
- CDEFG
- NaviPlus
When choosing an adapter, read reviews carefully, paying attention to compatibility with specific car models and the reliability of the connection.
Option 3: Screen Mirroring Devices (Not True CarPlay)
While not a true CarPlay integration older vehicles, some devices allow you to mirror your iPhone screen onto a separate display unit. These can offer some basic navigation and music control but lack the optimized interface and full Siri integration of CarPlay.
- How they work: These typically connect via Wi-Fi or USB to your phone and project your phone’s screen onto a dedicated display unit. The audio is often sent via FM transmitter or AUX.
- Limitations: They don’t offer the CarPlay experience; app layouts remain as they are on your phone, which can be distracting while driving. Siri integration is usually limited or non-existent.
- Recommendation: If your primary goal is CarPlay, stick to dedicated CarPlay solutions.
The Crucial Step: Checking Your Car’s Compatibility
Before you buy anything, it’s vital to determine what your current car setup allows. This is the most important part of a successful CarPlay retrofit.
H4: Assessing Your Existing Car Stereo
Your current car stereo is the key piece of information.
- Does it have a screen? If yes, what kind? Is it a basic display, or a more advanced touchscreen?
- Does it have a USB port? If yes, what is its function? Test it with a USB drive containing music files to see if it’s for data transfer or just charging.
- Does it have an AUX input? This is a 3.5mm audio jack, usually found on the front of the stereo or in the center console.
- What is the dashboard layout like? This will determine if a single-DIN, double-DIN, or a floating unit is feasible.
H5: Researching Your Specific Car Model
Online forums, car-specific groups, and manufacturer websites can be invaluable. Search for “[Your Car Model Year] CarPlay upgrade” or “[Your Car Model Year] aftermarket stereo.” You’ll often find others who have already performed similar upgrades, sharing their experiences, recommended products, and installation tips.
H5: Understanding Wiring Harnesses and Dash Kits
For aftermarket head units, these are non-negotiable if you want a clean, professional installation.
- Wiring Harness: Connects your new stereo to your car’s existing electrical system without cutting factory wires. Brands like Metra, Scosche, and PAC offer these.
- Dash Kit: A plastic or metal frame that allows a new stereo to fit snugly into your car’s dashboard opening. It often matches the color and texture of your existing dash.
You can usually find these by searching for “[Your Car Make Model Year] stereo installation kit” on automotive accessory websites.
The Installation Journey: DIY vs. Professional
Once you’ve chosen your method and purchased the necessary components, you’ll face the decision of whether to install CarPlay yourself or have it done professionally.
H4: DIY Installation: Rewarding but Requires Patience
Pros of DIY:
- Cost Savings: You save on labor costs.
- Personal Satisfaction: The pride of doing it yourself.
- Learning Experience: You gain knowledge about your car’s electronics.
Cons of DIY:
- Time Consuming: Can take several hours, especially for beginners.
- Risk of Errors: Incorrect wiring or installation can damage components or the car.
- Requires Tools: You’ll need specific tools.
- Troubleshooting: If something goes wrong, you’re on your own.
H4: Professional Installation: Convenience and Expertise
Pros of Professional Installation:
- Expertise: Technicians know what they’re doing.
- Time Savings: It’s done quickly and efficiently.
- Warranty: Many installers offer a warranty on their work.
- Proper Tools: They have specialized equipment.
Cons of Professional Installation:
- Cost: Labor costs can be significant.
- Finding a Reputable Installer: Requires research to find a good shop.
Where to get professional installation:
- Car Audio Shops: These are specialists in car stereo installations.
- Big Box Electronics Stores: Many have installation services.
- Mobile Installers: Some technicians will come to your location.
Connecting Your iPhone: Wired vs. Wireless CarPlay
Both wired CarPlay and Bluetooth CarPlay (via wireless adapters) offer the core CarPlay experience. Here’s a breakdown to help you choose.
H5: Wired CarPlay
- How it works: Connects your iPhone to the car’s head unit or adapter via a USB cable.
- Pros:
- Stable Connection: Less prone to dropouts than wireless.
- Charges iPhone: Keeps your phone powered up on longer trips.
- Often Faster Response: Can feel more immediate.
- Simpler Setup: Usually plug-and-play.
- Cons:
- Cable Clutter: Requires managing a USB cable in the car.
- Limited iPhone Placement: You need to keep your phone connected and within reach.
H5: Wireless CarPlay (Bluetooth CarPlay)
- How it works: Connects your iPhone wirelessly via Wi-Fi and Bluetooth.
- Pros:
- Cable-Free Convenience: No messy cables.
- Freedom of Placement: Your iPhone can stay in your pocket or bag.
- Faster Entry into CarPlay: Often connects automatically when you get in the car.
- Cons:
- Can Be Less Stable: Susceptible to interference, leading to occasional dropouts.
- Doesn’t Charge iPhone: You’ll need to charge your phone separately if needed.
- Slightly Slower Response: Can sometimes feel a fraction of a second behind wired.
- Initial Setup Required: Needs Bluetooth and Wi-Fi pairing.
For most people, the convenience of wireless CarPlay outweighs the minor drawbacks, especially if you have a reliable connection. However, if stability is your absolute priority, wired CarPlay is the way to go.
Frequently Asked Questions (FAQ)
Q1: Do I need a special app to use CarPlay?
No, Apple CarPlay is built into iOS. As long as your iPhone is compatible (iPhone 5 or later) and your car or adapter supports CarPlay, you just need to connect your iPhone.
Q2: Can I use CarPlay with my Android phone?
No, Apple CarPlay is exclusive to iPhones. If you have an Android phone, you’ll need to look for an aftermarket system that supports Android Auto. Many aftermarket head units offer both CarPlay and Android Auto.
Q3: My car has a USB port, but CarPlay doesn’t work. Why?
This is a common issue. The USB port in your car must be capable of data transfer, not just charging. Test this by plugging in a USB flash drive with music files. If your car can play music from the drive, the port is likely capable of data transfer. If not, you might need an adapter that uses an AUX connection or an aftermarket head unit.
Q4: How much does it cost to get CarPlay in an older car?
- CarPlay Adapters: These can range from $50 to $150.
- Aftermarket Head Units: Prices vary widely, from $150 for basic single-DIN units to $800+ for high-end double-DIN or floating display units.
- Installation Costs: Professional installation can add $100 to $400+, depending on the complexity and your location.
Q5: Will installing CarPlay void my car’s warranty?
Generally, if you perform a clean installation without cutting or damaging factory wiring, it’s unlikely to void your entire car warranty. However, any issues directly related to the audio system or its installation might be affected. Always proceed with caution and consider professional installation if you’re concerned.
Q6: Can I use CarPlay without a touchscreen in my car?
Yes, if your car’s existing radio system supports CarPlay, you can often control it using physical buttons and knobs on the dashboard, or via voice commands with Siri. However, the experience is significantly better and easier to navigate with a touchscreen. Adapters that come with their own screens are also a great option if your car lacks a touchscreen.
Q7: What’s the difference between “CarPlay retrofit” and “aftermarket CarPlay”?
These terms are often used interchangeably. A “CarPlay retrofit” generally refers to the process of adding CarPlay to a vehicle that didn’t come with it factory-installed. “Aftermarket CarPlay” refers to the products (head units, adapters) that are available to purchase and install to achieve this retrofit.
Conclusion: Modernizing Your Classic Drive
Adding Apple CarPlay to an older car is more accessible than ever. Whether you opt for a full aftermarket CarPlay head unit replacement for the ultimate upgrade or a simpler CarPlay adapter for older cars, you can significantly enhance your driving experience. By understanding your car’s capabilities and choosing the right solution, you can enjoy the convenience and safety of iOS in car technology without sacrificing the charm of your beloved vehicle. It’s time to connect iPhone to car radio and bring your classic ride into the modern age of connectivity!