
Can I remove swirl marks from my car by hand? Yes, you absolutely can remove swirl marks from your car by hand with the right products and techniques. This guide will walk you through everything you need to know for effective car polishing by hand and DIY swirl mark removal.
Swirl marks, those unsightly spiderweb scratches on your car’s paint, can be a real headache. They make even the most beautiful car look dull and neglected. While professional detailers use machines for automotive paint correction hand techniques, achieving a swirled-free finish is entirely possible with dedicated hand polishing swirls and careful work. This comprehensive guide will equip you with the knowledge and steps to tackle scratch removal by hand and make your car’s paint shine like new.
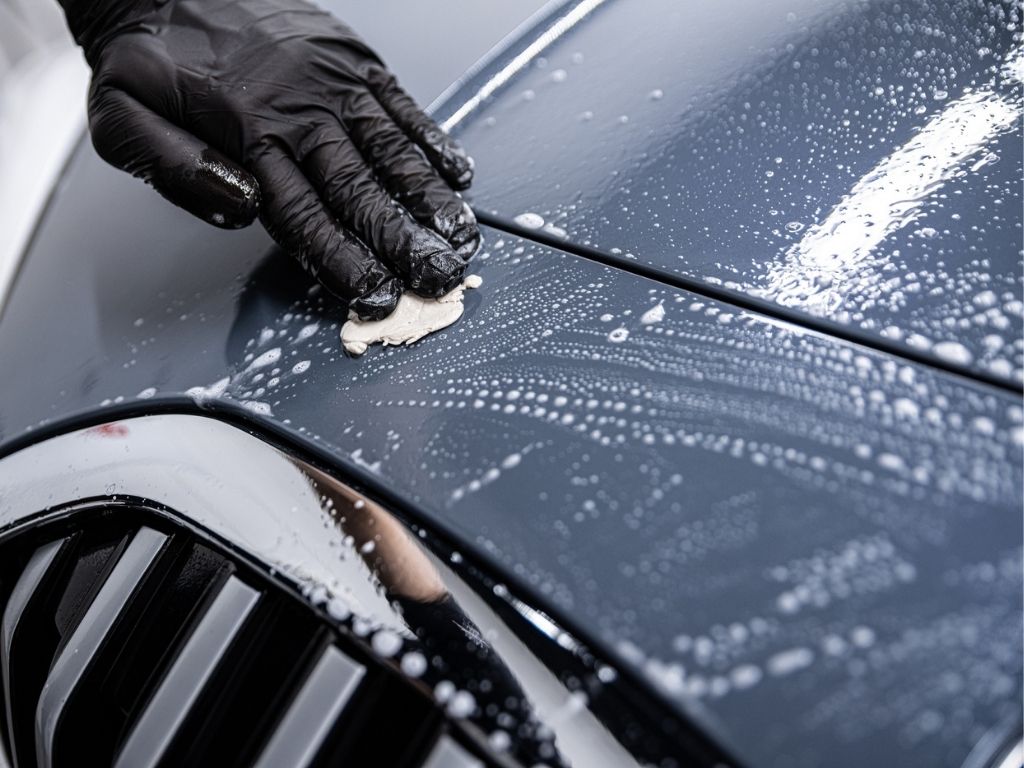
Image Source: 149881442.v2.pressablecdn.com
Deciphering Swirl Marks and Why They Appear
Before we dive into the removal process, it’s crucial to grasp what swirl marks are and how they form. These aren’t deep scratches, but rather light abrasions on the clear coat of your car’s paint. They scatter light, dulling the finish and creating that characteristic web-like pattern.
Common Causes of Swirl Marks:
- Improper Washing Techniques: This is the biggest culprit. Using dirty wash mitts, abrasive sponges, or washing in direct sunlight can drag dirt across the paint, creating swirls.
- Poor Drying Methods: Using rough towels or dragging a drying towel across a dirty surface can also introduce scratches.
- Automatic Car Washes: The brushes in automatic car washes are notorious for inflicting swirl marks due to accumulated dirt and debris.
- Low-Quality Polishing or Buffing: Using the wrong pads or compounds, or applying too much pressure without proper lubrication, can cause new swirls.
- Contaminated Cleaning Tools: Dust or grit on microfiber towels or applicators can easily scratch the paint.
Gathering Your Arsenal: The Hand Polishing Kit Essentials
To embark on your car polishing by hand journey, you’ll need a few key items. A well-stocked hand polishing kit is your best friend for removing paint defects by hand.
Essential Tools and Products:
- High-Quality Microfiber Towels: You’ll need many of these! Opt for plush, high-GSM (grams per square meter) towels for washing, drying, and buffing. Different colors for different tasks can prevent cross-contamination.
- Two-Bucket Wash Method Supplies:
- Two buckets (one for soapy water, one for rinsing your wash mitt).
- pH-neutral car wash soap.
- A soft wash mitt (lambswool or high-quality microfiber).
- Clay Bar and Lubricant: This is crucial for removing bonded contaminants before polishing.
- Car Polishing Compound: This is the abrasive product that does the actual scratch removal by hand. You’ll want a fine-cut or medium-cut compound for swirl removal. Look for products specifically designed for hand polishing compound applications.
- Applicator Pads: Foam or microfiber applicator pads are necessary for applying the polishing compound evenly.
- Polish (Optional but Recommended): After compounding, a finishing polish can further refine the paint and enhance gloss.
- Paint Sealant or Wax: To protect your freshly corrected paint.
- Gloves: To protect your hands from the chemicals.
- Good Lighting: Natural daylight is best, but a good quality LED work light can help you spot swirls.
Understanding Different Types of Hand Polishing Compound:
Not all compounds are created equal. For DIY swirl mark removal, you’ll typically be working with:
- All-in-One (AIO) Products: These combine cleaning, polishing, and protection in one step. They are user-friendly but may not offer the same level of correction as separate compounding and polishing steps.
- Compound: More aggressive than polishes, compounds contain larger abrasive particles designed to remove moderate imperfections like swirls and light scratches.
- Polish: Less abrasive than compounds, polishes are used to refine the paint further, remove very light hazing, and enhance gloss after compounding.
When buying a hand polishing compound, check the product description for its aggressiveness and intended use.
The Preparation Phase: Setting the Stage for Success
Proper preparation is paramount for successful hand polishing swirls. Skipping these steps can lead to more scratches or an ineffective correction.
Step 1: Thorough Washing
This is non-negotiable. A clean surface is essential.
- The Two-Bucket Method: Fill one bucket with your car wash soap and water, and the other with clean water.
- Dip your wash mitt into the soapy water.
- Wash the car panel by panel, starting from the top and working your way down.
- After washing a section, rinse your wash mitt thoroughly in the clean water bucket before dipping it back into the soapy water. This prevents dirt from being recirculated.
- Rinse each section of the car thoroughly as you go to prevent soap from drying.
Step 2: Decontamination with a Clay Bar
Even after washing, your paint may have bonded contaminants like tar, tree sap, and industrial fallout.
- Lubrication is Key: Generously spray the clay lubricant onto the section of the car you’re working on.
- Gentle Pressure: Glide the clay bar gently over the lubricated surface. You’ll feel it grab as it picks up contaminants.
- Knead the Clay: As the clay becomes dirty, fold and knead it to expose a clean surface. This prevents you from reapplying contaminants.
- Wipe and Inspect: After claying a section, wipe it dry with a clean microfiber towel and inspect for smoothness. If it still feels rough, repeat the process.
Step 3: Drying Your Car Properly
Water spots are another enemy of a pristine finish.
- Use Plush Microfiber Drying Towels: Gently pat the car dry or lay the towel over a panel and lift it straight up. Avoid dragging the towel across the paint.
- Work Quickly: Dry the car immediately after rinsing to prevent water spots.
The Hand Polishing Process: Bringing Back the Shine
Now comes the core of scratch removal by hand and swirl removal techniques. This is where patience and a steady hand pay off.
Step 4: Applying the Hand Polishing Compound
Choose a small, manageable section of the car to work on at a time (e.g., half a hood, one door).
- Apply Compound to the Applicator: Place a small amount of hand polishing compound (pea-sized or a dime-sized amount) onto your foam or microfiber applicator pad. Don’t overload the pad.
- Even Application: Apply the compound to the paint in a thin, even layer over the entire working section.
- Work the Compound: Using moderate, consistent pressure, work the compound into the paint using overlapping, controlled motions. A good pattern is to go up and down, then side to side across the panel.
- Buff Off: Allow the compound to slightly haze over. Then, take a clean, plush microfiber towel and gently buff off the residue.
Step 5: Inspect and Repeat if Necessary
- Inspect Your Work: Use a good light source to examine the section you just worked on. Are the swirl marks reduced or gone?
- Repeat the Process: If the swirls are still visible, you may need to apply another layer of compound to that section. Continue working in small sections until you achieve the desired results.
- Switch to a Finer Polish (Optional): If you used a medium-cut compound, you might want to follow up with a finer finishing polish to remove any minor hazing left by the compound and enhance gloss. Apply and buff this in the same manner as the compound.
Step 6: Protecting Your Newly Corrected Paint
Once you’ve completed hand polishing swirls across the entire car, it’s crucial to protect your hard work.
- Apply Sealant or Wax: Using a clean applicator pad, apply a thin, even layer of your chosen paint sealant or wax. Follow the product’s instructions for application and removal.
- Microfiber Buffing: Once the sealant or wax has hazed slightly, buff it off with a clean microfiber towel to reveal a brilliant shine.
Advanced Tips for Hand Polishing Car Paint
Mastering hand buffing car paint takes practice. Here are some tips to elevate your results:
Using Different Pads for Different Tasks
- Foam Applicator Pads: These are great for applying compounds and polishes evenly.
- Microfiber Applicator Pads: Can offer a bit more grip and are sometimes preferred for polishing.
- Microfiber Towels: For the final buffing and removal of product.
Working with Different Compounds
- Start with the Least Aggressive: Always begin with the least abrasive product and pad combination that can achieve the desired results. If a fine polish removes the swirls, there’s no need to use a more aggressive compound.
- Test Spot: Before committing to an entire panel, always perform a test spot in an inconspicuous area to gauge the effectiveness of your chosen product and technique.
Environmental Considerations
- Work in the Shade: Avoid direct sunlight. The heat can cause products to dry too quickly, making them harder to work with and potentially causing issues.
- Moderate Temperatures: Ideal temperatures are between 60-80°F (15-27°C).
Technique Refinements
- Consistent Pressure: Aim for consistent pressure throughout the process. Too little pressure won’t remove the swirls, while too much can introduce new defects.
- Controlled Movements: Use deliberate, overlapping passes. Don’t just randomly rub the product.
- Clean Towels: Always use a clean section of your microfiber towel for buffing. Fold your towel into quarters and use each side before switching to a new towel.
Common Mistakes to Avoid During Hand Polishing
Even with the best intentions, beginners can make a few common errors.
Over-Compounding
- Issue: Using too aggressive a compound or too much pressure, which can remove too much clear coat or create micro-marring.
- Solution: Start with a finer compound and gradually increase aggressiveness only if needed. Use light to moderate pressure.
Insufficient Washing and Decontamination
- Issue: Not removing all dirt and grime before polishing, which can lead to new scratches.
- Solution: Be meticulous with the washing and claying steps.
Using Dirty Applicators or Towels
- Issue: Reintroducing contaminants to the paint.
- Solution: Have plenty of clean towels and applicators ready. Inspect them regularly for dirt.
Working in Direct Sunlight
- Issue: Product drying too quickly, making it difficult to work with and potentially burning the paint.
- Solution: Always work in the shade or during cooler parts of the day.
Rushing the Process
- Issue: Not allowing enough time for each step, leading to incomplete correction or introducing new errors.
- Solution: Be patient. Car polishing by hand is a methodical process. Take your time with each panel.
Table: Swirl Mark Removal Product Comparison
Here’s a simplified comparison of product types you might encounter for scratch removal by hand:
| Product Type | Primary Function | Aggressiveness | Best For |
|---|---|---|---|
| Heavy Cut Compound | Removing deep scratches and heavy defects | High | Significant paint damage, not typically for beginner swirl removal. |
| Medium Cut Compound | Removing moderate swirls, oxidation, and light scratches | Medium | Excellent for most DIY swirl mark removal and hand polishing swirls. |
| Fine Cut Polish | Removing light hazing and refining paint after compounding | Low | Enhancing gloss, removing very minor imperfections, final finishing. |
| AIO (All-in-One) | Cleaning, polishing, and protecting in one step | Low to Medium | Quick detailing, maintaining a corrected finish. |
Frequently Asked Questions (FAQ)
Q1: How long does it take to remove swirl marks by hand?
A: The time it takes depends on the severity of the swirls, the size of your vehicle, and your experience. For a small to medium-sized car, expect to dedicate anywhere from 4 to 12 hours for thorough hand polishing car paint.
Q2: Can I use household products to remove swirl marks?
A: It is strongly advised against using household products like toothpaste or baking soda. These are often too abrasive and can cause more damage than they fix, leading to irreparable harm to your car’s clear coat. Stick to dedicated automotive paint correction hand products.
Q3: What is the difference between polishing and waxing?
A: Polishing is a corrective process that uses mild abrasives to remove imperfections like swirl marks and light scratches. Waxing is a protective step that adds a layer of protection and shine to the paint, but it doesn’t remove defects.
Q4: How often should I polish my car by hand?
A: You don’t need to polish your car every time you wash it. Polishing removes a small amount of clear coat. For most vehicles, polishing once or twice a year is sufficient to maintain a swirl-free finish, depending on your driving conditions and how often you wash your car.
Q5: Can I remove swirl marks from a matte finish car by hand?
A: No. Matte finishes require specialized products and techniques. Attempting to use standard compounds and polishes on a matte finish will likely ruin the texture and appearance. Always consult the vehicle manufacturer’s recommendations for matte paint.
Q6: What if the swirl marks are very deep?
A: If the swirl marks are deep enough that you can feel them with your fingernail, scratch removal by hand might not be sufficient. These deeper scratches may require professional machine polishing or repainting. Always perform a test spot to gauge the depth of the defects.
Q7: Do I need a special lighting setup for hand polishing?
A: While not strictly necessary, good lighting makes a huge difference. Natural daylight is ideal. If you’re working indoors or at night, use a bright LED work light (preferably a swirl finder light) to clearly identify the swirl marks and ensure you’re effectively removing them.
By following these steps and recommendations, you can confidently tackle DIY swirl mark removal and achieve a beautifully corrected finish on your car through diligent car polishing by hand. Enjoy the satisfaction of a swirl-free, gleaming ride!