
Can you remove swirl marks from your car? Yes, you absolutely can remove swirl marks from your car. Swirl marks are those unsightly, spiderweb-like scratches that dull your car’s finish. They’re usually caused by improper washing and drying techniques. Thankfully, with the right approach and tools, you can restore your car’s paint to a showroom shine. This guide will walk you through the process of car paint correction and paint restoration to buff out swirls effectively.
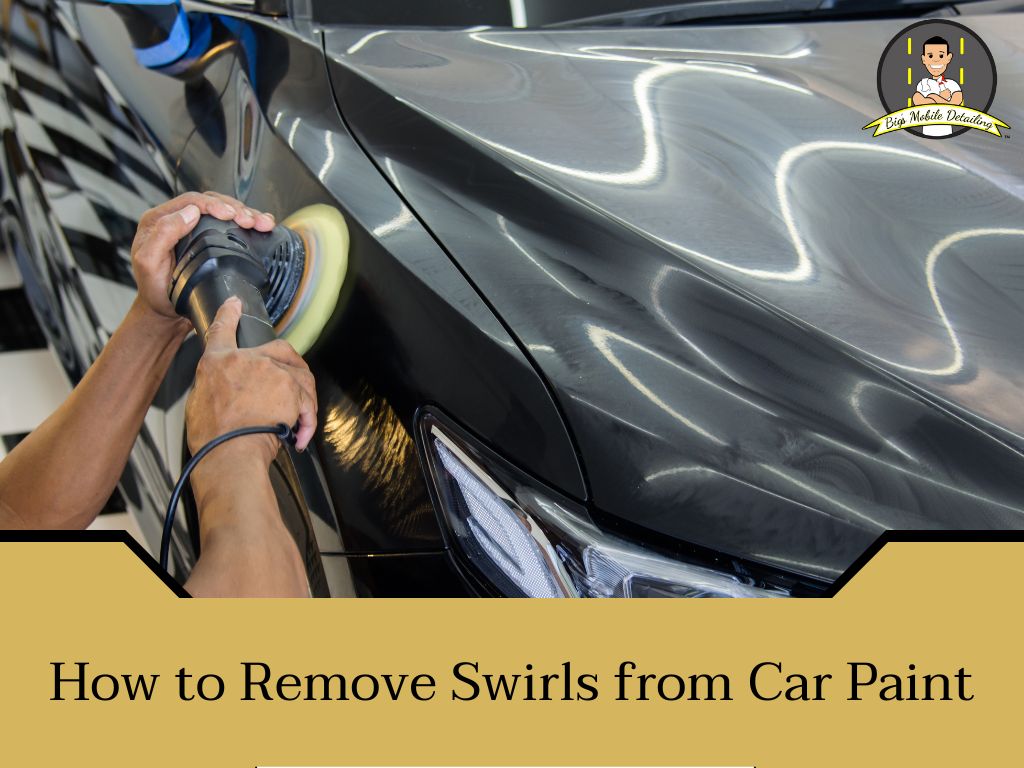
Image Source: 149881442.v2.pressablecdn.com
Deciphering the Nature of Swirl Marks
Swirl marks, also known as micro-scratches, are very fine scratches on your car’s clear coat. They occur when dirt or grit is dragged across the paint surface during washing or drying. Think of it like this: if you wipe a dusty table with a dry cloth, you’ll likely leave faint scratches. The same principle applies to your car. These marks scatter light, making your paint look dull and hazy.
What Causes These Annoying Marks?
- Improper Washing: Using dirty wash mitts, sponges, or buckets can introduce grit to the paint. Washing in straight lines instead of a circular motion can also contribute.
- Harsh Drying: Using abrasive towels, especially those that have been dropped on the ground, can scratch the paint. Rubbing too hard when drying is a common culprit.
- Automatic Car Washes: The brushes and cloths in automatic car washes are often laden with dirt and grit from previous vehicles, leading to swirl marks.
- Poorly Applied Waxes and Polishes: Applying and removing some products with dirty towels can create scratches.
- Automatic Brushes and Touchless Washes: While touchless sounds good, some use harsh chemicals that can etch the paint, and automatic brushes, even if new, can still harbor abrasive particles.
Preparing Your Vehicle for Swirl Removal
Before you can polish out scratches, thorough preparation is key. This ensures you’re working on a clean surface and don’t introduce new contaminants.
Step 1: The Crucial Wash and Decontamination
A clean canvas is essential for effective automotive polishing.
Thorough Washing Techniques
- Two-Bucket Method: Use one bucket for your soapy water and another for rinsing your wash mitt. This prevents transferring dirt back onto the paint.
- pH-Neutral Car Wash Soap: Opt for a soap designed for car care. Harsh detergents can strip protective layers and even damage the paint.
- Microfiber Wash Mitts: These are soft and trap dirt effectively, minimizing the risk of scratching.
- Gentle Washing Motion: Wash from top to bottom, using straight-line motions rather than aggressive circular scrubbing. Rinse your mitt frequently in the rinse bucket.
Decontaminating the Paint
Even after a good wash, bonded contaminants can remain. A detailing clay bar is your best friend here.
- Using a Clay Bar: A clay bar, when used with a lubricant (like a specialized clay lube or diluted car wash soap), glides over the paint and lifts embedded contaminants such as industrial fallout, tar, and brake dust.
- How to Clay Bar: Spray a generous amount of lubricant on a small section of the paint. Gently glide the clay bar over the lubricated surface. You’ll feel the clay grab as it picks up contaminants. Fold the clay frequently to expose a clean surface. If you drop the clay, discard it; it’s now full of grit.
Step 2: Inspecting the Paint
Once decontaminated, it’s time to see the extent of the damage.
- Lighting is Key: Use a good LED flashlight or detailing light held at an angle to the paint surface. This will highlight the swirl marks and other imperfections.
- Identify the Depth: Not all scratches are created equal. Some are in the clear coat and can be polished out. Others are deeper, potentially down to the paint color or even primer, and will require professional attention or repainting.
The Art of Removing Swirl Marks: Polishing Techniques
This is where the magic happens. Removing swirl marks involves leveling the clear coat to remove the microscopic valleys that cause the scattering of light. This is achieved through automotive polishing.
Choosing the Right Tools and Products
Polishing Machines
- Dual-Action (DA) Polisher: This is the recommended choice for most DIY detailers. It spins and oscillates, making it much safer and less likely to burn through the paint than a rotary polisher. It’s also more forgiving.
- Rotary Polisher: This machine spins in a single direction. It’s more aggressive and effective at removing deep scratches but requires a lot of skill and practice to avoid damaging the paint.
Polishing Pads
Pads come in various materials (foam, wool, microfiber) and aggressiveness.
- Cutting Pads: These are typically firmer and more abrasive, designed to remove deeper scratches and oxidation.
- Polishing Pads: These are softer and used for lighter defect removal and refining the finish after compounding.
- Finishing Pads: These are the softest, used for applying waxes or sealants and for the final gloss enhancement.
Polishing Compounds and Swirl Removers
These are abrasive liquids or creams that do the actual work of removing the imperfections.
- Compounds: These contain larger abrasive particles and are used for heavy defect removal. They will typically leave a slightly hazy finish that needs to be refined with a finer polish. Compounding paint is a more aggressive process.
- Polishes: These contain finer abrasives and are used to remove lighter scratches, haze, and swirl marks left by compounds or previous polishing steps. They also impart gloss. A good polish can polish out scratches effectively.
- All-in-One (AIO) Products: These combine polishing and protection, offering a quicker solution.
The Polishing Process: Step-by-Step
Step 1: Apply the Polish to the Pad
- Place a few drops of polish onto the polishing pad. Don’t over-apply; a little goes a long way.
- Spread the polish over a small section of the paint (e.g., 2×2 feet) before starting the polisher.
Step 2: Polishing Technique with a DA Polisher
- Start Slow: Begin with the polisher on a low speed to spread the polish evenly.
- Increase Speed: Gradually increase the speed to the manufacturer’s recommended level for the polish and pad combination (often medium to high).
- Work in Sections: Work on a small, manageable area at a time.
- Apply Light Pressure: Let the machine do the work. Excessive pressure can generate too much heat and damage the paint.
- Cross-Hatch Pattern: Move the polisher in a cross-hatch pattern (forward and backward, then side to side) to ensure even coverage. Overlap each pass by about 50%.
- Work Until Clear: Continue polishing until the polish becomes clear or turns to a light residue. This indicates the abrasives have broken down.
- Wipe Off Residue: Use a clean, plush microfiber towel to gently wipe away the polish residue.
Step 3: Inspect and Repeat if Necessary
- Use your light to inspect the section you just polished.
- If swirl marks are still visible, you may need to:
- Make another pass with the same polish and pad.
- Switch to a more aggressive compound or pad combination (if the initial attempt was with a lighter polish).
- If deeper scratches remain, you might need to step up to a more aggressive compound.
Step 4: Refining the Finish
After removing the bulk of the swirl marks with a compound or aggressive polish, you’ll likely need to refine the finish.
- Switch to a Finer Polish: Use a less aggressive polish and a softer polishing or finishing pad.
- Repeat the Polishing Process: Follow the same techniques as above, but with lighter pressure and potentially a slightly lower speed. This step removes any hazing left by the previous stage and maximizes gloss. This is crucial for gloss enhancement.
What About Hand Polishing?
While machine polishing is far more efficient and effective, you can remove some swirl marks by hand, especially lighter ones.
- Use a Quality Hand Polish: Look for polishes specifically designed for hand application.
- Microfiber Applicator Pads: Use these for applying the polish.
- Firm, Even Pressure: Apply firm, consistent pressure in small sections using a back-and-forth motion.
- Work in Sections: Cover a small area at a time.
- Buff Off: Wipe away residue with a clean microfiber towel.
- Expect Less Dramatic Results: Hand polishing is much more labor-intensive and may not remove as many or as deep swirl marks as machine polishing.
Table: Choosing the Right Polish and Pad Combination
| Defect Severity | Recommended Polish Type | Recommended Pad Type (DA Polisher) | Goal |
|---|---|---|---|
| Very Light | Ultra-Fine Polish | Soft Finishing Pad | Minor haze removal, maximum gloss |
| Light Swirls | Fine Polish | White or Yellow Polishing Pad | Remove micro-scratches, light swirls |
| Moderate Swirls | Medium Polish | Orange or Green Polishing Pad | Remove moderate swirls, light scratches |
| Heavy Swirls | Compound | Blue or Red Cutting Pad | Remove deep swirls, moderate scratches |
| Deep Scratches | Heavy Cut Compound | Wool or Stiff Foam Cutting Pad | Remove deep scratches (use with caution) |
Note: Always start with the least aggressive method. If it doesn’t work, you can step up.
Protecting Your Restored Paint
Once you’ve successfully removed the swirl marks and achieved a brilliant shine, it’s vital to protect that finish.
Applying Protection
- Waxes: Provide a warm, deep glow and good protection for a few weeks to a couple of months.
- Sealants: Offer longer-lasting protection (several months) and a slick, glassy look.
- Ceramic Coatings: These are the most durable option, providing protection for years. They offer superior chemical resistance and hydrophobic properties. Applying a ceramic coating is an advanced step but offers the best long-term protection for your paint restoration.
Application Tips
- Clean Surface: Ensure the paint is perfectly clean before applying any protection. A final wipe-down with an isopropyl alcohol (IPA) solution can remove any polishing oils, ensuring better bonding.
- Thin, Even Coats: Apply waxes, sealants, or coatings in thin, even layers.
- Buff Off: Use clean microfiber towels to buff off any residue.
Addressing Deeper Scratches: Beyond Swirls
While this guide focuses on swirl marks, it’s important to know when you’re dealing with deeper damage.
What is a Car Scratch Remover?
A car scratch remover is typically a mild polish or a specialized product designed to fill in or lightly abrade the edges of very shallow scratches, making them less visible. They are generally not effective on deep scratches that have penetrated the clear coat.
When is Compounding Necessary?
If swirl marks are deep enough that your fingernail catches on them, or if you have more prominent scratches, compounding paint will be necessary. This involves using a more aggressive polish and pad to level the paint surface more significantly. Always follow compounding with a finer polish to restore the clarity and gloss.
Maintaining Your Flawless Finish
Preventing new swirl marks is just as important as removing the old ones.
Best Practices for Washing and Drying
- Hand Wash: Always opt for hand washing.
- Two Buckets: Never skip the two-bucket method.
- Microfiber Mitts and Towels: Invest in high-quality microfiber wash mitts and drying towels.
- Drying Techniques:
- Blot, Don’t Rub: Gently blot water off the surface with your microfiber drying towel.
- Drying Aids: Use a spray-on drying aid (like a spray wax or detailer) which lubricates the surface and helps water sheet off, reducing the need for rubbing.
- Air Blower: A leaf blower or a dedicated car dryer can safely blow water off the surface, especially from crevices, minimizing towel contact.
- Detailing Clay Bar Regularly: Use a detailing clay bar periodically (every 6-12 months) to remove bonded contaminants before they become ingrained and cause further damage.
Frequently Asked Questions (FAQ)
Q1: Can I remove swirl marks with just a rubbing compound?
A1: Rubbing compound is aggressive and can remove swirl marks, but it will often leave a hazy finish that needs to be followed up with a finer polish. It’s best used as a first step in aggressive paint correction.
Q2: How long does it take to remove swirl marks?
A2: The time varies greatly depending on the severity of the swirls, the size of the vehicle, and whether you’re using a machine or polishing by hand. A full paint restoration process can take anywhere from a few hours to a full day or more.
Q3: Will waxing remove swirl marks?
A3: No, waxing will not remove swirl marks. Wax adds a layer of protection and shine on top of the existing paint surface, but it doesn’t correct or remove scratches.
Q4: Is it safe to polish my car myself?
A4: Yes, if you use the right tools and techniques. A Dual-Action (DA) polisher is much safer for beginners than a rotary polisher. Always start with the least aggressive products and work your way up if needed. Watch tutorials and practice on a test panel if possible.
Q5: What’s the difference between compounding and polishing?
A5: Compounding uses coarser abrasives to remove deeper scratches and defects, often leaving a slightly duller finish. Polishing uses finer abrasives to remove lighter scratches, haze, and the dullness left by compounding, restoring clarity and gloss.
Q6: How often should I polish my car?
A6: You don’t need to polish your car every time you wash it. Over-polishing can thin the clear coat. Polishing is typically done when you want to correct paint defects like swirl marks or oxidation, perhaps once or twice a year, or as needed.
By following these professional tips, you can effectively tackle swirl marks and achieve a stunning gloss enhancement for your vehicle. Remember patience and the right technique are key to successful car paint correction and achieving that perfect finish.