
Can you remove glue from car window tint without damaging it? Yes, you can, with the right approach and products. This guide will walk you through the steps to safely tackle car tint residue and ensure your window tint remains in excellent condition. We’ll cover everything from identifying the type of adhesive to the best methods for sticky residue removal.
Whether you’re dealing with leftover adhesive from old tint, stickers, or even vinyl wrap glue that’s seeped onto your tint, the process can seem daunting. However, with patience and the correct techniques, you can achieve a clean, residue-free finish. This post will equip you with the knowledge to perform decal removal from tint and understand how to remove tint adhesive effectively.
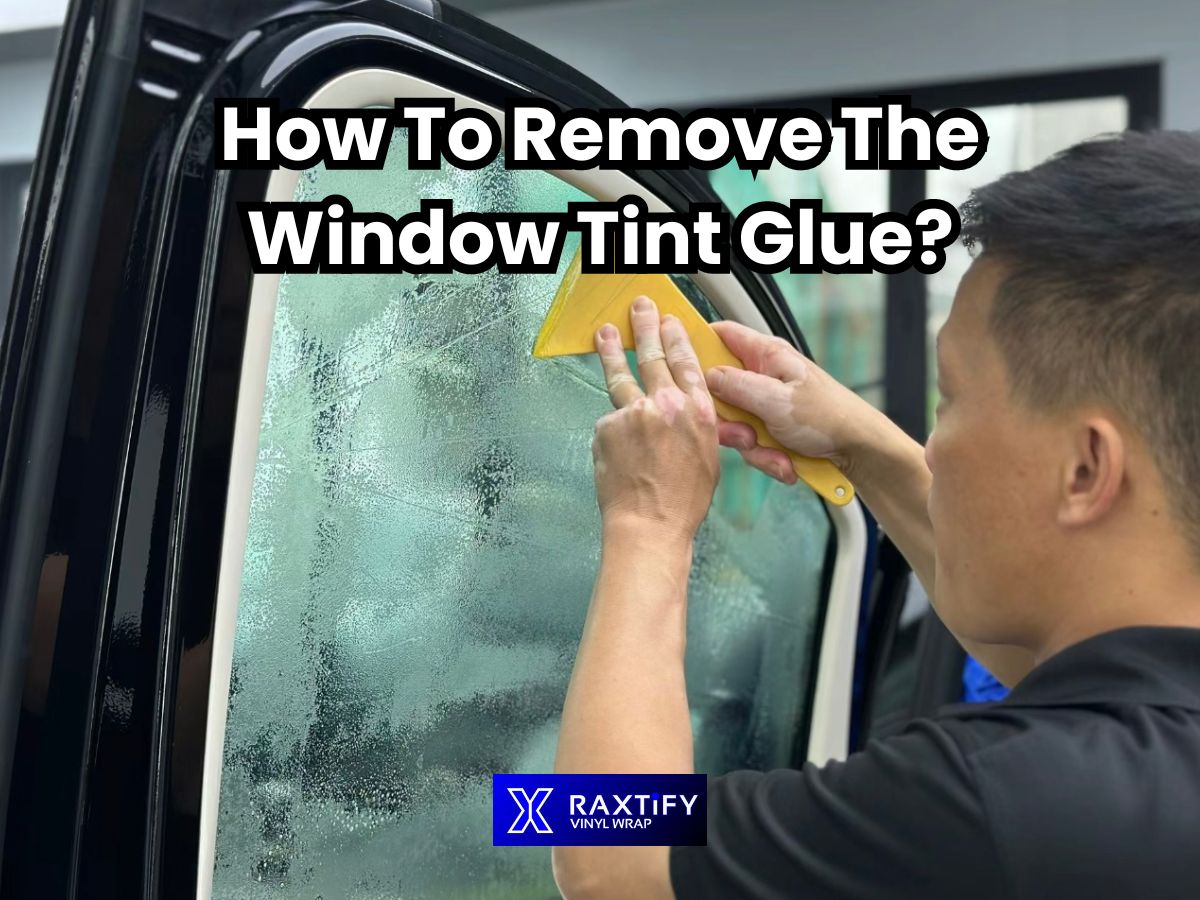
Image Source: raxtify.com
Why Glue Appears on Your Window Tint
Glue can find its way onto your car window tint for several reasons:
- Previous Tint Removal: When older window tint is removed, the adhesive layer often remains stuck to the glass. This is a common cause of car tint residue.
- Stickers and Decals: Many drivers apply stickers or decals to their windows. When these are removed, they frequently leave behind sticky remnants.
- Accidental Spills: Sometimes, glue from other projects can accidentally spill or be applied to the tinted windows.
- Aftermarket Accessories: Certain aftermarket accessories might be applied with adhesive that can transfer to or affect the window tint.
Identifying the Type of Glue
Before you start, it’s helpful to identify the type of glue you’re dealing with. This can influence the best removal method.
- General Purpose Adhesives: These are common glues like super glue or craft glue. They usually require solvents.
- Sticker Adhesives: These are often rubber-based and can be sticky and gummy. Specialized adhesive removers work well.
- Window Film Adhesives: The adhesive that comes with window film itself can be stubborn, especially if it’s dried out or old.
Essential Tools and Supplies for Safe Tint Glue Removal
Having the right tools makes the job much easier and safer for your window tint.
- Microfiber Towels: Soft, lint-free towels are crucial for applying solutions and wiping away residue without scratching.
- Plastic Scrapers or Razor Blades (with extreme caution): For tougher, dried-on glue, a plastic scraper or a new, sharp razor blade held at a very low angle can be used. However, this is the riskiest step for tint and should be approached with utmost care.
- Spray Bottle: For applying cleaning solutions evenly.
- Gloves: To protect your hands from cleaning agents.
- Safety Glasses: To protect your eyes.
- Window Cleaner: A good quality ammonia-free window cleaner for the final clean-up.
Choosing the Right Glue Remover for Window Tint
Selecting the best glue remover for window tint is vital to avoid damaging the film. Harsh chemicals can cloud, discolor, or even peel the tint.
Here are some effective options, ranging from common household items to specialized products:
1. Isopropyl Alcohol (Rubbing Alcohol)
- Pros: Readily available, relatively safe for most tints when diluted, effective on many types of adhesive.
- Cons: Can sometimes take multiple applications for stubborn residue.
- How to Use: Mix a solution of 50% isopropyl alcohol and 50% water in a spray bottle. Spray onto the affected area, let it sit for a few minutes, and gently wipe with a microfiber towel.
2. White Vinegar
- Pros: Natural, inexpensive, and generally safe for tints.
- Cons: May not be as effective on very strong adhesives.
- How to Use: Mix equal parts white vinegar and water. Apply to the glue, let it soak, and then gently scrub and wipe.
3. Specialized Window Film Adhesive Remover
- Pros: Specifically formulated to break down adhesives without harming window film. Often very effective.
- Cons: Can be more expensive than household items.
- How to Use: Follow the product instructions carefully. These are often applied directly to the residue and allowed to dwell before wiping. Look for products labeled as window film adhesive remover or safe tint removal solutions.
4. Citrus-Based Cleaners
- Pros: Often biodegradable and have a pleasant smell. Can be effective on gummy residue.
- Cons: Some citrus cleaners can be too strong for certain tints. Always test in an inconspicuous area.
- How to Use: Apply a small amount to a microfiber cloth and gently rub the glue.
5. Heat Gun or Hair Dryer (Use with Extreme Caution)
- Pros: Heat can soften many adhesives, making them easier to remove.
- Cons: Heat gun tint removal is risky. Too much heat can damage the tint, causing it to shrink, bubble, or peel. A hair dryer on a low setting is safer.
- How to Use: Hold the heat source several inches away from the window. Move it continuously to avoid overheating any one spot. Gently try to peel or wipe the softened glue away.
Step-by-Step Guide to Removing Glue from Car Window Tint
Here’s a detailed process for safely removing glue from your car’s tinted windows:
Step 1: Clean the Window Surface
Before you begin tackling the glue, clean the entire window. This removes dirt and debris that could scratch the tint during the removal process.
- Use an ammonia-free glass cleaner and a clean microfiber cloth.
- Wipe the window thoroughly.
Step 2: Apply Your Chosen Adhesive Remover
Now it’s time to attack the glue.
- Test First: Whichever product you choose, always test it on a small, inconspicuous area of the tint first to ensure it doesn’t cause any damage or discoloration. Wait a few minutes to see the effect.
- Apply Liberally: Spray or apply your chosen remover onto the gluey area. Make sure the glue is well-saturated.
- Allow Dwell Time: Let the remover sit for the recommended time. This allows it to break down the adhesive. For isopropyl alcohol or vinegar solutions, 5-10 minutes is usually sufficient. Specialized removers might have different instructions.
Step 3: Gently Agitate and Wipe
Once the adhesive has had time to soften:
- Use a clean microfiber towel to gently rub the glue. Work in small, circular motions.
- If the glue is still stubborn, you might need to apply more remover and let it sit longer.
Step 4: Using a Plastic Scraper (If Necessary)
For very stubborn, dried-on glue:
- Consider a Plastic Scraper: A plastic razor blade or a plastic putty knife is much safer than a metal one.
- Lubricate the Area: Keep the area wet with your chosen remover or soapy water.
- Low Angle: Hold the scraper at a very low angle to the glass, almost parallel.
- Gentle Pressure: Apply gentle, consistent pressure. Avoid digging the edge into the tint. The goal is to lift the softened glue.
- Avoid Metal Razor Blades: While effective for bare glass, metal razor blades are highly likely to scratch or tear your window tint. If you must use one, it requires extreme precision and a very shallow angle, and it’s still a significant risk.
Step 5: Repeat if Necessary
For tough jobs, you might need to repeat steps 2-4 multiple times. Patience is key. Avoid excessive scrubbing or force, as this can damage the tint.
Step 6: Final Clean-Up
Once all the glue residue is gone:
- Clean the window again with an ammonia-free glass cleaner and a clean microfiber cloth.
- This removes any remaining residue from the cleaning solution and leaves your window sparkling clean.
Methods for Specific Types of Glue
Let’s look at how to tackle different kinds of sticky situations.
Removing Sticker Residue from Tint
Sticker adhesive is often gummy and can be difficult to remove without smearing.
- Method: Start with isopropyl alcohol. If that doesn’t fully work, a dedicated sticky residue removal product or a citrus-based cleaner can be very effective. A plastic scraper can help lift the softened residue.
Dealing with Old Window Film Adhesive
When removing old tint, the adhesive can be dried and brittle, or sometimes sticky.
- Method: This often requires patience. A good window film adhesive remover is usually the best bet. You may need to apply it multiple times and let it soak. Gentle scraping with a plastic scraper is often necessary.
Tackling Vinyl Wrap Glue on Tint
If vinyl wrap glue has transferred to your tint, it can be particularly challenging.
- Method: Isopropyl alcohol is a good starting point. For tougher vinyl adhesives, a specialized adhesive remover or even a mild degreaser (ensure it’s safe for tints!) might be required. Always test first.
What NOT to Do When Removing Glue from Tint
To ensure safe tint removal, avoid these common mistakes:
- Using Ammonia-Based Cleaners: Ammonia can damage and cloud window tint over time. Always opt for ammonia-free glass cleaners.
- Using Abrasive Materials: Steel wool, rough sponges, or abrasive cleaning pads will scratch and ruin your tint.
- Using Metal Razor Blades Carelessly: As mentioned, metal blades are high-risk for damaging tint. If used at all, it must be with extreme caution and a very shallow angle.
- Excessive Force or Scrubbing: Aggressive scrubbing can scratch or tear the tint film. Be gentle.
- Using Harsh Solvents Without Testing: Acetone, lacquer thinner, or other strong solvents can melt or discolor window tint. Always test in a hidden spot.
- Overheating with a Heat Gun: A heat gun tint removal technique requires precise control. Too much heat can irrevocably damage the tint.
Can You Scrape Tint Glue Safely?
Yes, you can scrape tint glue, but with significant caveats. Scraping tint glue should be a last resort for very stubborn adhesives and performed with extreme care.
- Safest Option: Use a plastic scraper or plastic razor blade.
- Lubrication is Key: Always keep the area lubricated with a cleaning solution or remover.
- Shallow Angle: Hold the scraper at a very low angle to the glass.
- Gentle, Steady Pressure: Avoid gouging or digging.
- Avoid Metal: Metal scrapers significantly increase the risk of scratching or damaging the tint film.
Frequently Asked Questions About Tint Glue Removal
Q: How long does it take to remove glue from window tint?
A: The time can vary greatly depending on the type of glue and how long it has been there. It could take anywhere from 15 minutes to a couple of hours, especially if multiple applications are needed.
Q: Will Goo Gone damage my window tint?
A: Goo Gone is generally considered safe for most window films, as it’s a citrus-based solvent. However, it’s always best to test it on a small, inconspicuous area of the tint first to be sure.
Q: Can I use a magic eraser on window tint glue?
A: It’s not recommended. Magic erasers are made of melamine foam, which is abrasive. While they can be effective on glass, they can easily scratch or dull the finish of window tint.
Q: What is the best way to remove residue after tint removal?
A: After removing old tint, the best approach is to use a good quality window film adhesive remover. Follow the product instructions, usually involving application, dwell time, and gentle wiping or scraping with a plastic tool.
Q: Is WD-40 safe for window tint?
A: WD-40 can sometimes be used for sticky residue removal on car windows, but it’s a lubricant and can leave an oily film that might be difficult to remove from tint. If you use it, clean thoroughly with an ammonia-free glass cleaner afterward. It’s generally safer to use products specifically designed for tint or common household cleaners like isopropyl alcohol.
Q: Can I remove decals from tint without damaging it?
A: Yes, you can. Start by gently peeling off as much of the decal as possible. Then, use isopropyl alcohol or a dedicated adhesive remover to soften and remove the remaining sticky residue. Use a plastic scraper if needed, always at a low angle.
Conclusion: Achieving a Pristine Tint Finish
Removing glue from your car window tint doesn’t have to be a dreaded task. By choosing the right products, using gentle techniques, and exercising patience, you can effectively tackle car tint residue and restore your windows to a clean, undamaged state. Remember to prioritize safe tint removal by testing products and avoiding harsh abrasives or chemicals. With this DIY guide, you’re well-equipped to handle any sticky situation that comes your way.