
Can you hand polish a car? Yes, absolutely! Hand polishing a car is a fantastic way to restore its shine and protect its paint. It’s a key part of car detailing and can make a world of difference in your vehicle’s appearance. This guide will walk you through the entire process, from preparation to the final shine, ensuring you get those enviable, deep gloss results.
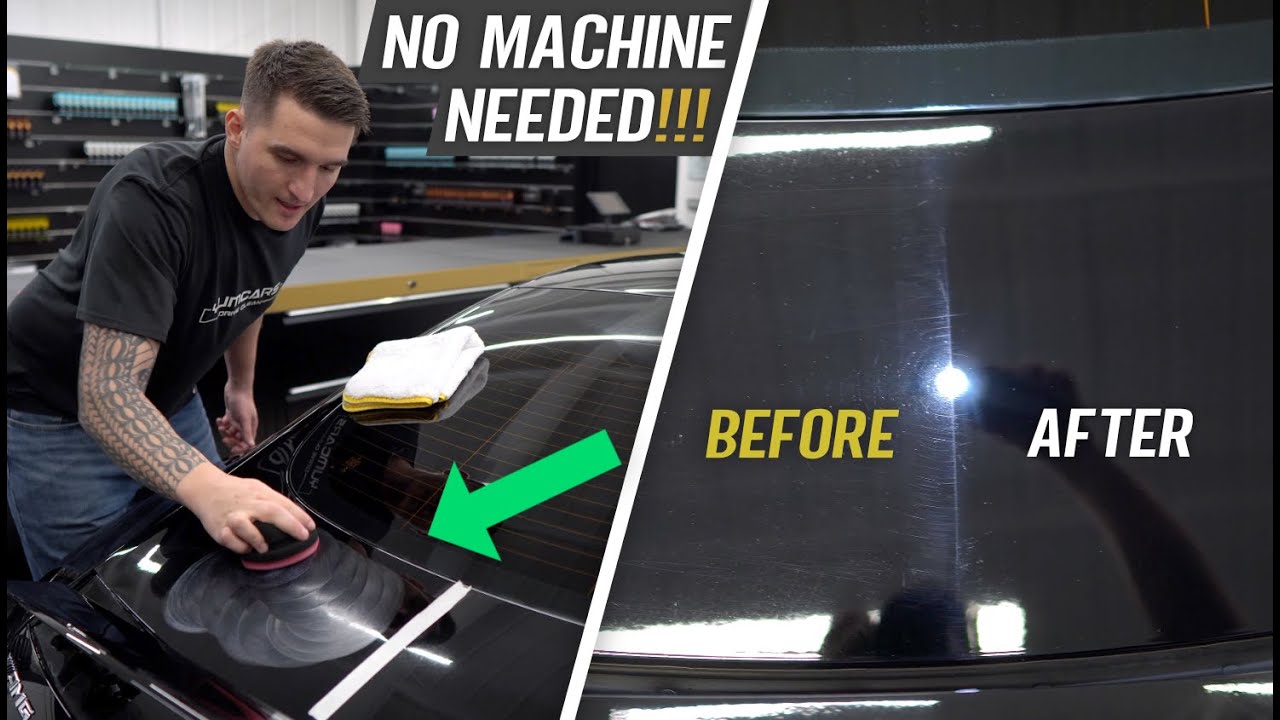
Image Source: i.ytimg.com
Why Hand Polish Your Car?
Many people wonder why they should bother with hand polishing when car polishing machine options are readily available. Hand polishing offers a more intimate connection with your vehicle’s paint. You can feel the imperfections, control the pressure more precisely, and truly learn the nuances of your car’s finish. While machines are faster and can be more aggressive for deep paint correction, hand polishing is more accessible for beginners and provides excellent results for light imperfections and regular maintenance. It’s a rewarding process that can significantly improve your car’s look and value.
Getting Started: What You’ll Need
Before you begin, gather all the necessary detailing products and tools. Having everything ready ensures a smooth and efficient process.
Essential Tools and Products:
- Two Buckets: One for soapy water, one for rinsing your wash mitt. This prevents dirt from going back onto the paint.
- Wash Mitt: A soft, plush microfiber wash mitt is ideal.
- Car Wash Soap: A pH-neutral car wash soap is crucial to avoid stripping existing wax or sealant.
- Drying Towels: High-quality, plush microfiber drying towels are a must to prevent scratches during drying.
- Clay Bar Kit: This includes a clay bar and a lubricant spray. Essential for removing bonded contaminants.
- Car Polish: Choose a polish suitable for your paint’s condition. Polishes contain mild abrasives to remove minor defects.
- Applicator Pads: Foam or microfiber applicator pads are used to apply the polish evenly.
- Microfiber Towels: Plenty of clean, high-quality microfiber towels for wiping away polish residue.
- Gloves: Protect your hands from the chemicals.
- Optional: Tape: Painter’s tape to protect trim and sensitive areas.
Step-by-Step Guide to Hand Polishing Your Car
This process involves several stages, each contributing to the final brilliant shine. Follow these steps carefully for the best outcome.
Step 1: Thorough Washing and Drying
This is the foundation of any good car detailing. You cannot polish a dirty car.
Washing the Car:
- Rinse: Start by thoroughly rinsing the entire car with a hose to remove loose dirt and debris.
- Prepare Buckets: Fill one bucket with your car wash soap and water. Fill the second bucket with clean water for rinsing your wash mitt.
- Wash from Top to Bottom: Using your wash mitt, start from the roof and work your way down. This ensures that dirt and grime are washed downwards, away from cleaner areas.
- Rinse Mitt Frequently: Dip your wash mitt into the clean water bucket after each section to rinse away dirt before going back into the soapy water.
- Rinse Thoroughly: Once the car is washed, rinse it completely to remove all soap residue.
Drying the Car:
- Blot, Don’t Rub: Gently pat the car dry with your microfiber drying towels. Avoid rubbing vigorously, as this can cause scratches.
- Work in Sections: Dry the car in sections to prevent water spots from forming.
- Use Multiple Towels: Have several drying towels on hand. Once one towel becomes saturated, switch to a dry one.
Step 2: Decontaminating the Paint
Before polishing, the paint surface needs to be free of any bonded contaminants. This is where a clay bar comes in handy for effective swirl mark removal and general paint smoothness.
Using a Clay Bar:
- Prepare the Clay Bar: Knead a small portion of the clay bar until it becomes pliable.
- Lubricate the Surface: Spray a generous amount of clay lubricant onto a small section of the car’s paint.
- Glide the Clay: Gently glide the clay bar over the lubricated surface. You’ll feel resistance as it lifts contaminants. As the clay picks up dirt, fold it into itself to expose a clean surface.
- Wipe Away Residue: Once a section is complete, wipe away the lubricant residue with a clean microfiber towel.
- Repeat: Work in small sections, covering the entire vehicle, including windows and clear coats. You’ll be surprised at how much gunk the clay removes!
Step 3: Inspecting the Paint for Defects
Now it’s time to identify what needs to be fixed. This inspection is crucial for effective paint correction.
Looking for Imperfections:
- Good Lighting: Find a well-lit area, preferably outdoors in the shade or under strong artificial lights.
- Check for:
- Swirl Marks: Fine, circular scratches that look like cobwebs. These are often caused by improper washing techniques.
- Scratches: Deeper lines in the paint. Hand polishing can remove light scratches.
- Oxidation: Dull, faded areas of paint, especially on older cars.
- Water Spots: Mineral deposits left behind after water evaporates.
- Tar and Bugs: Stubborn spots that washing and claying may not fully remove.
Step 4: Hand Polishing the Paint
This is the core of achieving that shiny result. Hand polishing uses abrasives to level the paint surface, removing imperfections and restoring gloss. This is a vital step in automotive polishing.
Applying the Polish:
- Choose Your Polish: Select a polish based on the severity of the defects. Start with a finer polish for light correction and work up to a more aggressive one if needed.
- Use Applicator Pads: Apply a small amount of polish (about a dime-sized amount) to a foam or microfiber applicator pad.
- Work in Small Sections: Polish one small section at a time (e.g., 2ft x 2ft).
- Apply Even Pressure: Using moderate, consistent pressure, spread the polish over the section in a back-and-forth or cross-hatch pattern. Ensure you overlap your strokes.
- Work the Polish: Continue working the polish until it starts to dry or become clear. This indicates the abrasives have done their job.
- Wipe Away Residue: Using a clean microfiber towel, gently wipe away the polish residue.
- Inspect Your Work: Check the section for improvement. If defects remain, you can apply another layer of polish. For deeper scratches or severe swirl marks, you might need a more aggressive polish or consider a car polishing machine for better results.
- Repeat: Continue this process for the entire car, panel by panel.
Table 1: Polish Selection Guide for Hand Polishing
| Defect Type | Polish Aggressiveness | Recommended Polish Type | Hand Polishing Effectiveness |
|---|---|---|---|
| Light Swirls, Hazing | Fine | Finishing Polish, Swirl Remover | High |
| Moderate Swirls, Scuffs | Medium | All-in-One Polish, Cleaner Polish | Moderate |
| Light Scratches, Oxidation | Coarse | Cutting Polish, Compound | Low to Moderate |
| Deep Scratches, Heavy Oxidation | Very Coarse | Heavy Cut Compound | Low (Machine Recommended) |
Step 5: Removing Polish Residue
After polishing each section, it’s important to properly remove the residue.
Wiping Off Polish:
- Use Clean Microfiber Towels: Have a stack of clean, soft microfiber towels ready.
- Gentle Wiping: Gently wipe away the dried polish residue from the paint.
- Flip and Fold: As a towel gets saturated with residue, flip it to a clean side or fold it to expose a fresh surface.
- Buff to a Shine: Once most of the residue is removed, use a separate clean, dry microfiber towel to lightly buff the area to a high shine. This final buff helps reveal the true gloss of the paint.
Step 6: Applying Car Wax or Sealant
Polishing removes defects and cleans the paint surface. Applying a wax or sealant protects the polished finish and enhances the shine. This is a crucial step in proper car maintenance.
Wax Application:
- Choose Your Protection: Select a quality car wax (natural Carnauba for warmth and depth) or a synthetic sealant (for longer-lasting durability).
- Use Applicator Pads: Apply a thin, even layer of wax or sealant to a foam or microfiber applicator pad.
- Apply in Small Sections: Work in small sections, applying the product in a back-and-forth or circular motion.
- Allow to Haze: Let the wax or sealant dry to a haze. This usually takes 5-15 minutes, depending on the product and environmental conditions. Check the product instructions.
- Buff Off: Using a clean, plush microfiber towel, gently buff off the haze to reveal a deep, glossy finish.
- Repeat: Continue this process for the entire vehicle.
Table 2: Wax vs. Sealant Considerations
| Feature | Car Wax (Carnauba) | Synthetic Sealant |
|---|---|---|
| Shine | Warm, deep, natural glow | Bright, reflective, slick |
| Durability | Shorter lifespan (weeks to months) | Longer lifespan (months to a year+) |
| Application | Generally easier, more forgiving | Can be slightly more technical |
| Protection | Good, but less robust than sealants | Excellent, forms a strong barrier |
| Best Use | Show cars, regular maintenance | Daily drivers, long-term protection |
Step 7: Cleaning Glass and Trim
Don’t forget the details! Clean glass and trim enhance the overall finished look.
Final Touches:
- Glass Cleaner: Use a dedicated automotive glass cleaner and a clean microfiber towel to clean all windows.
- Trim Dressing: Apply a trim dressing to plastic and rubber trim to restore their color and protect them from UV damage.
Tips for Achieving the Best Results
- Work in the Shade: Direct sunlight can cause polishes and waxes to dry too quickly, making them difficult to work with and potentially causing streaking.
- Keep Products Cool: Store your detailing products in a cool, dry place.
- Use the Right Amount of Product: Too much product can make buffing difficult. Start with a small amount and add more if needed.
- Clean Towels are Key: Always use clean microfiber towels. Dirty towels will reintroduce scratches.
- Don’t Rush: Hand polishing takes time and patience. Enjoy the process and focus on quality.
- Test Spot: If you’re unsure about a polish, test it on an inconspicuous area first.
Addressing Common Issues
Swirl Mark Removal with Hand Polishing
Hand polishing is very effective for swirl mark removal. The mild abrasives in the polish gently level the paint surface, removing the microscopic peaks and valleys that cause the appearance of swirls. Patience and consistent pressure are key here. For very deep or persistent swirls, a car polishing machine might be necessary for aggressive paint correction.
Scratch Repair by Hand
Hand polishing can tackle light scratches. These are scratches that don’t go through the clear coat. By leveling the paint around the scratch, the abrasive polish effectively makes the scratch disappear. Deeper scratches, where you can feel a distinct groove with your fingernail, usually require more aggressive methods or professional repair. For minor scratch repair, a good quality polish and a lot of elbow grease are your allies.
Maintaining Your Polished Shine
Once you’ve achieved that beautiful shine, proper car maintenance is essential to keep it looking its best.
- Regular Washing: Wash your car regularly with a pH-neutral soap to remove dirt and contaminants.
- Quick Detailer: Use a quick detailer spray between washes to remove light dust and fingerprints.
- Top-Up Protection: Reapply wax or sealant every few months, or as recommended by the product manufacturer.
Hand polishing your car is a deeply satisfying process that can transform its appearance. By following these steps and using the right detailing products, you can achieve professional-level results and keep your car looking its best. Happy polishing!
Frequently Asked Questions (FAQ)
Q1: How often should I hand polish my car?
A1: You should hand polish your car based on its condition and how often it’s exposed to the elements. For most cars, polishing once or twice a year is sufficient for regular car maintenance. If you notice significant dullness, minor scratches, or swirl marks, you might need to polish more frequently.
Q2: Can I use a dish soap to wash my car before polishing?
A2: No, it is strongly advised not to use dish soap. Dish soaps are harsh and designed to cut grease. They can strip away existing wax or sealants and even damage your car’s paint protective layers, leaving it more vulnerable. Always use a dedicated pH-neutral car wash soap.
Q3: Is hand polishing as good as using a machine polisher?
A3: For minor imperfections, light scratches, and swirl marks, hand polishing can yield excellent results. However, for deep scratches, heavy oxidation, or significant paint correction, a car polishing machine (like a dual-action polisher) is much more effective and efficient due to its consistent power and speed. Hand polishing requires more physical effort and time for the same level of correction.
Q4: What’s the difference between polishing and waxing?
A4: Polishing uses mild abrasives to remove minor paint defects like swirl marks and light scratches, effectively smoothing and leveling the paint surface to restore clarity and gloss. Waxing or applying a sealant is a protective step that adds a layer of gloss and shields the polished paint from environmental contaminants, UV rays, and dirt. You polish first, then wax.
Q5: My car has deep scratches. Can hand polishing fix them?
A5: Hand polishing is generally effective for very light scratches and scuffs that haven’t penetrated the clear coat. If you can feel a scratch with your fingernail, it’s likely too deep for hand polishing to fully remove. In such cases, more aggressive paint correction techniques, possibly involving a machine polisher with a coarser compound, or professional repair might be necessary.