
Image Source: 149881442.v2.pressablecdn.com
How to Properly Remove Swirls from Car Paint (DIY Guide)
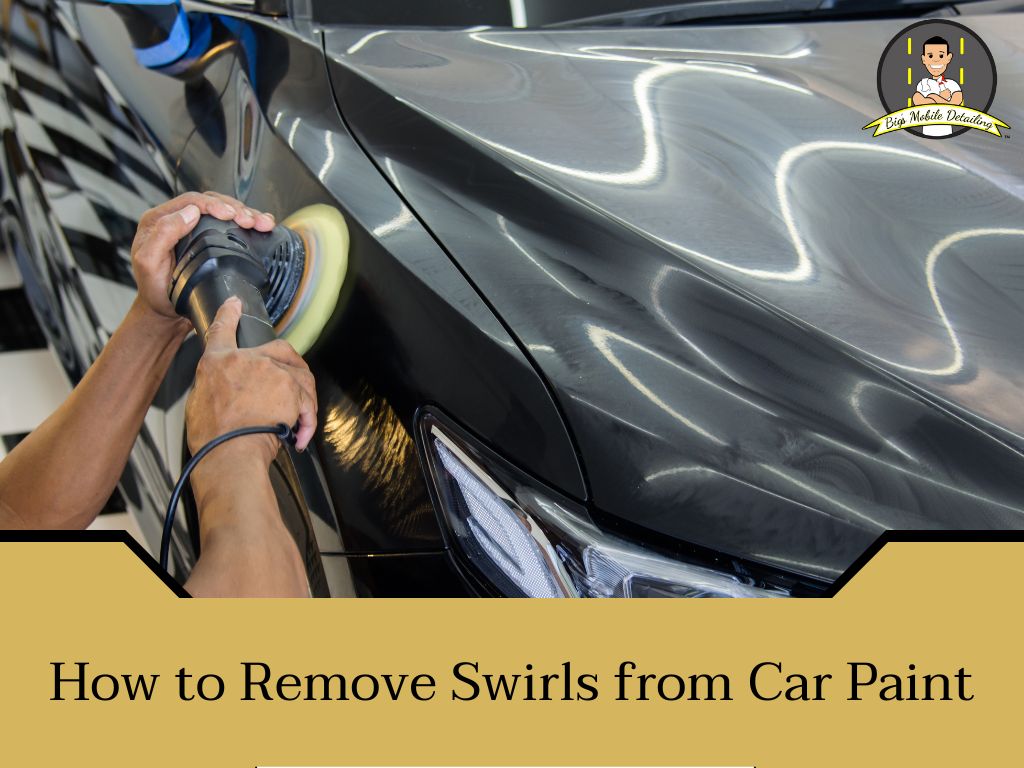
Can you remove swirls from car paint yourself? Yes, you can effectively remove swirls from your car’s paint at home with the right approach and tools. Swirl marks, often described as fine, circular scratches that resemble spiderwebbing, diminish your car’s paintwork’s shine and clarity. This guide will walk you through the process of car paint correction to polish out scratches and remove spiderwebbing, restoring your vehicle’s finish. We’ll cover everything from the necessary supplies to the step-by-step techniques involved in paint defect removal and achieving a showroom-quality shine. This is essential for effective automotive detailing.
Why Do Swirls Appear on Car Paint?
Swirl marks are a common paint defect. They happen over time due to everyday use and improper washing techniques.
- Washing Techniques: Using dirty wash mitts or sponges, or washing your car in a dusty environment, can drag grit across the paint. This acts like sandpaper, creating fine scratches.
- Drying Methods: Using abrasive towels or drying the car while it’s still dirty can also cause swirls.
- Automatic Car Washes: The brushes in automatic car washes are often abrasive and can be loaded with dirt from previous vehicles, leading to significant swirl marks.
- Poor Quality Polishing: Incorrect use of polishing compounds or aggressive polishing can create a different type of swirl known as holograms.
Fathoming the Swirl Removal Process
Removing swirls involves a process called car paint correction. This aims to level the paint surface, removing the shallow scratches that cause the swirling. The most effective method for DIYers is machine polishing.
Key Principles of Swirl Removal:
- Abrasion: You need to gently abrade the paint surface to remove the high points of the scratches.
- Leveling: The goal is to create a smooth, flat surface that reflects light uniformly, making the paint appear glossy.
- Protection: After correction, protecting the paint with wax or sealant is crucial to prevent future damage.
Essential Supplies for DIY Swirl Removal
Gathering the right tools is vital for a successful swirl removal job. Using incorrect equipment can worsen the problem.
What You’ll Need:
- Dual Action (DA) Polisher: This is a safer option for beginners than a rotary polisher. It moves in an orbital and spinning motion, reducing the risk of burning through paint.
- Polishing Pads: Different grades of foam pads are needed for different stages of correction.
- Cutting Pads: Aggressive foam for removing deeper swirls.
- Polishing Pads: Medium aggressiveness for removing lighter swirls and refining the finish.
- Finishing Pads: Soft pads for applying final polish or wax.
- Automotive Polishes: These are the abrasive compounds that do the work.
- Compound: A more aggressive polish for heavier defects.
- Polish: A less aggressive polish for lighter swirls and refining.
- Microfiber Towels: High-quality, plush microfiber towels are essential for wiping away polish residue and for drying.
- Car Wash Supplies: A good quality car wash soap, two buckets (one for washing, one for rinsing), and a wash mitt.
- Clay Bar Kit: To decontaminate the paint surface before polishing.
- IPA (Isopropyl Alcohol) Solution: For cleaning the paint surface to check your work between stages.
- Gloves and Safety Glasses: To protect yourself.
Step-by-Step Guide to Removing Swirls
This process involves several careful steps. Patience is key for achieving the best results.
Step 1: Thoroughly Wash and Decontaminate the Vehicle
Before any correction work can begin, the car must be impeccably clean.
- Wash: Use the two-bucket method. One bucket with soapy water, and the other with clean rinse water for your wash mitt. This prevents you from putting dirt back onto the paint.
- Decontaminate: Use a clay bar kit. This removes embedded contaminants like industrial fallout, tar, and rail dust that washing alone won’t remove. Spray a lubricant on the surface and glide the clay bar over it. Wipe away any residue.
Step 2: Inspect the Paintwork
Proper inspection helps you determine the severity of the swirls and what products to use.
- Lighting: Use a bright LED work light or a sun-facing angle to see the swirls clearly. Look for the characteristic circular patterns.
- Assess Severity: Are the swirls light or deep? This will dictate the aggressiveness of the polish and pad you need.
Step 3: Choose Your Polishing Products and Tools
Selecting the right combination of polish and pad is crucial.
Pad and Polish Pairing for Swirl Removal:
| Defect Severity | Pad Type | Polish Type | Goal |
|---|---|---|---|
| Light Swirls | Finishing Pad | Fine Polish | Refine, add gloss |
| Medium Swirls | Polishing Pad | All-in-One Polish | Remove moderate defects |
| Heavy Swirls/Scratches | Cutting Pad | Compound | Remove deep scratches, heavy defects |
- Test Spot: Always start with the least aggressive combination (e.g., a polishing pad and a fine polish) on a small, inconspicuous area. If it doesn’t remove the swirls, gradually increase the aggressiveness. This is part of paint finishing.
Step 4: Machine Polishing Technique
Machine polishing requires a gentle touch and proper technique to avoid damaging the paint.
- Apply Polish: Place 3-4 small dots of polish onto the polishing pad.
- Spread the Polish: Place the pad onto the paintwork before turning on the polisher. Spread the polish over a small section (about 2×2 feet).
- Start Polishing: Turn on the DA polisher at a low speed to keep the polish from slinging.
- Work the Section: Increase the speed to a medium setting (typically 4-5 on a DA polisher). Move the polisher slowly and deliberately across the section, overlapping each pass by about 50%. Use light to moderate pressure. Work the polish until it becomes clear and the residue starts to break down. This is how you buff out swirls.
- Wipe Away Residue: Use a clean microfiber towel to wipe away the polish residue immediately.
- Inspect: Use your IPA solution and a clean microfiber towel to wipe down the section. This removes any oils from the polish, allowing you to see if the swirls are gone. If not, repeat the process or try a more aggressive pad/polish combination.
Step 5: Progression of Polishing
You might need multiple passes or different combinations to achieve perfect results.
- Stage 1 (Compounding): If you have deeper swirls, start with a cutting pad and a compound. This is the most aggressive step to polish out scratches.
- Stage 2 (Polishing): After compounding, you might notice hazing or micro-marring. Switch to a polishing pad and a finer polish to remove these defects and refine the finish. This step is crucial for clear coat restoration.
- Stage 3 (Finishing/Jeweling): For the ultimate shine and to remove any remaining haze or hologram removal, use a finishing pad with a very fine polish.
Step 6: Final Wipe Down and Inspection
Once you’ve worked on all areas and are satisfied with the swirl removal, perform a final wipe-down.
- IPA Wipe: Again, use your IPA solution to ensure all polish residue is gone. Inspect your work under good lighting. You should see a significant improvement in clarity and gloss.
Step 7: Protection
After car paint correction, the paint is highly susceptible to new damage.
- Apply Sealant or Wax: Apply a good quality paint sealant or wax to protect the newly corrected paint. This adds a layer of protection against UV rays, dirt, and future minor scratches. Follow the product’s instructions for application.
Troubleshooting Common Issues
Even with careful work, you might encounter minor problems.
Hologram Removal:
Holograms are circular patterns left by aggressive polishing or using the wrong pad/polish combination.
- Cause: Often caused by using a cutting compound with too much pressure or a rotary polisher incorrectly.
- Solution: Use a softer finishing pad and a fine polish. Work slowly and with minimal pressure on a DA polisher.
Paint Depth and Burn-Through:
Aggressive polishing, especially on edges and curves, can thin or even remove the clear coat.
- Prevention: Use the least aggressive method needed. Avoid excessive pressure. Keep the polisher moving constantly.
- Detection: If you see a dull, matte area, you might have gone too far. Stop immediately.
- Correction: Deep burn-through cannot be fixed with DIY methods and requires professional repainting.
Maintaining Your Swirl-Free Finish
Once you’ve achieved a flawless finish, proper maintenance is key.
- Washing: Continue using the two-bucket method. Use a grit guard in your wash bucket.
- Drying: Use high-quality, plush microfiber drying towels. Blot the water rather than rubbing aggressively.
- Storage: Park your car in a garage or under cover when possible to protect it from environmental contaminants.
Frequently Asked Questions (FAQ)
Here are some common questions people have about removing swirls.
Q1: How long does it take to remove swirls from a car?
A: The time can vary greatly depending on the size of the car, the severity of the swirls, and your experience level. A full car correction can take anywhere from 6 to 12 hours, or even longer for beginners.
Q2: Can I remove swirls by hand?
A: While you can reduce the appearance of very light swirls by hand using a polishing compound and a microfiber applicator, it’s incredibly time-consuming and often less effective for moderate to heavy swirling. Machine polishing is far more efficient and yields better results for significant paint defect removal.
Q3: What’s the difference between compounding and polishing?
A: Compounding is a more aggressive process that uses coarser abrasives to remove deeper scratches and defects. Polishing uses finer abrasives to remove lighter swirls, haze, and to refine the finish left by compounding. Both are part of car paint correction.
Q4: Is it safe to use a rotary polisher for DIY swirl removal?
A: Rotary polishers are more aggressive and require a higher skill level. They can easily burn through paint if not used correctly. For DIYers, a Dual Action (DA) polisher is significantly safer and easier to master for buffing out swirls.
Q5: How often should I polish my car?
A: You don’t need to polish your car very often. Once or twice a year is usually sufficient for most vehicles, depending on how much you drive and environmental factors. Over-polishing can thin the clear coat.
Removing swirls from your car paint is a rewarding process that can dramatically improve your vehicle’s appearance. By following these steps and using the right tools, you can achieve professional-level results from the comfort of your own garage, bringing back that deep, glossy shine and performing effective clear coat restoration.