
Yes, you can jump an RV battery with your car, but it requires careful execution and the right equipment to prevent damage to either vehicle. This process is commonly known as an RV battery jump start, and it’s a vital skill for any RV owner. If you find yourself with a dead RV battery, especially when you’re jump starting a travel trailer battery or your main camper, your car can often be the solution.
The question of how to jump an RV from a car is a frequent one. Many people wonder about the car to RV battery connection and the potential risks involved. Fathoming the correct procedure ensures you don’t damage sensitive electronics in either the car or the RV. This guide will walk you through the steps, safety precautions, and essential considerations for a successful jump start a camper battery operation. We’ll also touch upon using car to charge RV battery as a temporary solution and the intricacies of jump starting large battery banks often found in larger RVs.
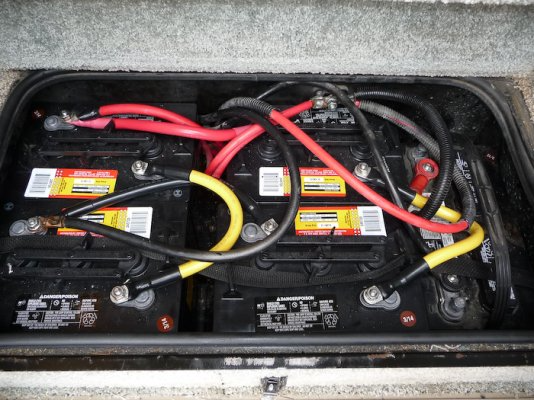
Image Source: www.lichtsinn.com
Deciphering the Basics: Why RV Batteries Die
Before diving into the jump-starting process, it’s helpful to understand why RV batteries might fail. RVs have different electrical demands than standard cars. They often have one or more deep-cycle batteries designed to provide sustained power for appliances like refrigerators, lights, water pumps, and entertainment systems over extended periods. Unlike a car’s starting battery, which delivers a short, powerful burst of energy, RV batteries are meant to be discharged and recharged repeatedly.
Common culprits for a dead RV battery include:
- Inverter Usage: Running high-draw appliances like microwaves, hair dryers, or coffee makers through the RV’s inverter can quickly drain the battery.
- Parasitic Draw: Even when “off,” many RV systems have a small electrical draw that can deplete batteries over time, especially if the RV sits unused for extended periods. This includes things like the clock, alarm systems, and standby power for electronics.
- Old or Damaged Batteries: Like all batteries, RV batteries have a lifespan. Age, improper charging, or extreme temperatures can degrade their capacity and eventually lead to failure.
- Lack of Charging: Not running the RV’s engine or generator regularly, or not connecting to shore power, means the batteries aren’t being replenished.
- Cold Weather: Extreme cold can significantly reduce battery performance and capacity.
- Leaving Lights or Appliances On: Simple forgetfulness can be a major cause of dead batteries.
The Core Question: Can Your Car Jump Your RV?
In short, yes, but with important caveats. Your car’s alternator is designed to charge its own relatively small starting battery. While it can provide a charge, it might not be powerful enough to quickly recharge a significantly depleted, larger RV battery bank. Think of it as giving a boost, not a full recharge. The primary goal is to get enough power into the RV battery to start the RV’s engine, allowing the RV’s own alternator to take over.
Key Differences: Car Batteries vs. RV Batteries
- Purpose: Car batteries are primarily for starting the engine. RV batteries are deep-cycle, designed for sustained power delivery.
- Capacity: RV battery banks, especially in larger motorhomes, can have much higher amp-hour (Ah) ratings than car batteries.
- Voltage: Most modern RVs and cars use 12-volt systems, which is why a jump-start is even possible. However, some larger RVs might have 24-volt systems, which would require a different approach. Always confirm your RV’s battery voltage.
Safety First: Essential Preparations for an RV Battery Jump Start
Safety is paramount when attempting any jump start methods for RV or jump starting large battery banks. Improper connections can lead to sparks, explosions, or damage to electrical systems.
What You’ll Need:
- Heavy-Duty Jumper Cables: Do not use thin, cheap jumper cables. For RVs, you need thick, high-quality cables with good clamps. Look for cables rated for at least 100 amps, preferably more. The longer the cables, the easier it will be to position your car.
- Safety Glasses: To protect your eyes from potential sparks or battery acid.
- Gloves: To protect your hands.
- A Wire Brush: To clean battery terminals for a better connection.
- Your Car’s Owner’s Manual: To locate the battery and identify any specific jump-starting instructions or potential issues.
- Your RV’s Owner’s Manual: To locate the battery and check for any specific jump-starting procedures or warnings.
Pre-Jump Check:
- Identify Battery Locations: Locate the batteries in both your car and your RV. For cars, it’s usually under the hood. RV battery locations vary greatly – they can be in a compartment on the side of the RV, under the steps, in a battery box on the tongue of a travel trailer, or under the chassis.
- Inspect Batteries: Check both batteries for any signs of damage, leaks, or corrosion. If a battery is visibly damaged, cracked, or leaking, do not attempt to jump it. This could be extremely dangerous.
- Turn Off Everything: Ensure both vehicles are completely off. Turn off all lights, the radio, air conditioning, and any other electrical accessories in both the car and the RV. This prevents surges that could damage electronics.
- Engage Parking Brakes: Apply the parking brake firmly on both vehicles.
- Transmission in Park/Neutral: Ensure the car’s transmission is in Park (or Neutral for a manual) and the RV’s transmission is in Park (or Neutral).
- Ventilation: If jump-starting in an enclosed space like a garage, ensure adequate ventilation. Batteries can release flammable hydrogen gas during charging.
The Step-by-Step Guide: Connecting Car to RV for Jump
The process of connect car to RV for jump requires precision. Always follow these steps in order to minimize the risk of sparks and damage.
Connecting the Cables: The Crucial Order
This is the most critical part. Getting the order wrong can cause a dangerous arc of electricity.
- Connect Red Clamp to Dead RV Battery: Attach one end of the red (positive, +) jumper cable to the positive terminal of the dead RV battery. Ensure the clamp has a good, solid grip on the terminal.
- Connect Other Red Clamp to Good Car Battery: Attach the other end of the red (positive, +) jumper cable to the positive terminal of your car’s battery. Again, ensure a firm connection.
- Connect Black Clamp to Good Car Chassis: Attach one end of the black (negative, -) jumper cable to the negative terminal of your car’s battery.
- Connect Other Black Clamp to Good RV Chassis (Away from Battery): This is the most important step for safety. Attach the other end of the black (negative, -) jumper cable to a clean, unpainted metal surface on the RV’s chassis or engine block, away from the battery. This could be a bolt head on the engine or a metal bracket. Never connect the final black clamp directly to the negative terminal of the dead RV battery. Doing so can create a spark right next to the battery, which could ignite hydrogen gas and cause an explosion.
Table: Jumper Cable Connection Sequence
| Step | Cable Color | Connect To | Vehicle | Notes |
|---|---|---|---|---|
| 1 | Red (+) | Positive Terminal | Dead RV Battery | Ensure a solid connection. |
| 2 | Red (+) | Positive Terminal | Good Car Battery | Ensure a solid connection. |
| 3 | Black (-) | Negative Terminal | Good Car Battery | Ensure a solid connection. |
| 4 | Black (-) | Unpainted Metal Chassis/Engine Block | RV (Away from Battery) | Crucial for safety to avoid sparks near battery. |
The Jump-Starting Process:
- Start the Car: Start your car’s engine and let it run for a few minutes. Keep the RPMs slightly elevated (around 1500-2000 RPM) to help charge the dead RV battery more effectively.
- Wait and Check: Let the car run for at least 5-10 minutes. You might see the RV’s interior lights flicker or come on dimly, indicating some charge is getting through.
- Attempt to Start the RV: After a sufficient waiting period, try to start the RV’s engine.
- If the RV Starts: Great! Let both vehicles run for another 5-10 minutes. Then, disconnect the jumper cables in the reverse order they were connected.
- Remove the black clamp from the RV chassis.
- Remove the black clamp from the car battery.
- Remove the red clamp from the car battery.
- Remove the red clamp from the RV battery.
Once disconnected, keep the RV’s engine running for at least 30 minutes to allow its alternator to charge the battery. Driving the RV is the best way to do this.
- If the RV Doesn’t Start: Don’t crank the engine for too long (more than 10-15 seconds at a time). Wait a few minutes and try again. You might need to let the car run longer to build up more charge. If it still doesn’t start after a few attempts, the RV battery might be too far gone, or there could be another issue with the RV’s starting system.
- If the RV Starts: Great! Let both vehicles run for another 5-10 minutes. Then, disconnect the jumper cables in the reverse order they were connected.
Potential Pitfalls and Troubleshooting
Even with careful adherence to the procedure, things can go wrong. Here’s some RV battery troubleshooting and common issues:
-
No Power to RV:
- Check Connections: Ensure all clamps are making firm contact with clean surfaces. Wiggle them slightly.
- Cable Quality: Inferior cables might not carry enough current.
- Dead RV Battery: The battery might be completely beyond saving and unable to accept a charge.
- Other RV Electrical Issues: A blown fuse, a bad connection in the RV’s wiring, or a fault in the RV’s charging system could also be the problem.
-
Car Battery Drains: If your car’s battery is also weak, it might not have enough power to jump the RV. You might need a stronger or better-charged car battery.
-
Sparks During Connection: This usually happens if the last connection is made directly to the negative terminal of the dead battery. Always connect to the chassis.
-
Damage to Electronics: Modern vehicles and RVs have sensitive computers and electronics. While a proper jump usually doesn’t cause issues, faulty cables or incorrect connections can.
When to Call a Professional
If you’re unsure about any step, or if the RV still won’t start after attempting a jump, it’s best to call for roadside assistance or a qualified RV technician. Trying to force it can lead to more expensive damage.
Alternatives and Considerations for RV Battery Management
While jumping your RV battery with your car is a viable temporary solution, it’s not ideal for long-term battery health.
Using Car to Charge RV Battery: The Limitations
Using car to charge RV battery with jumper cables is a very slow and inefficient process. Your car’s alternator is not designed to charge large deep-cycle batteries quickly. It’s best used to provide enough of a jolt to start the RV engine so the RV’s own systems can take over charging. For actual charging, you’ll want to:
- Run the RV Engine: This is the most direct way for the RV’s alternator to charge its own batteries.
- Use a Generator: A generator provides consistent power to charge the RV batteries.
- Connect to Shore Power: Plugging into a campground’s electrical hookup is the standard method for keeping RV batteries charged.
- Install a Solar Charging System: Solar panels provide a renewable and passive way to keep your RV batteries topped up.
- Use a Dedicated RV Battery Charger: An external, multi-stage RV battery charger is the most efficient way to charge your batteries when you’re not traveling or connected to shore power.
Jump Starting Large Battery Banks
Many motorhomes have multiple batteries, often connected in series or parallel to create larger battery banks for increased voltage or capacity. Jump starting large battery banks follows the same principles but might require more power and longer charging times. Ensure your jumper cables are robust enough for the combined amperage draw. If your RV has a 24-volt system, you cannot jump-start it with a standard 12-volt car without a special voltage converter, which is uncommon. Always verify your RV’s battery system voltage.
When Not to Jump Your RV Battery
- Damaged Batteries: As mentioned, cracked, leaking, or corroded batteries are a danger.
- Wrong Voltage: If your RV has a 24-volt system and your car is 12-volt, do not attempt to jump unless you have specific conversion equipment.
- No Suitable Jumper Cables: Using inadequate cables is a recipe for disaster.
- Uncertainty: If you don’t feel comfortable or confident, it’s always better to seek professional help.
Frequently Asked Questions (FAQ)
How long should I let my car run to jump an RV battery?
Allow your car to run for at least 5-10 minutes, keeping the RPMs slightly elevated (around 1500-2000 RPM). For heavily discharged or very large RV battery banks, you may need to let it run longer, up to 15-20 minutes.
Can I jump start a travel trailer battery with my car?
Yes, you can jump start a travel trailer battery with your car, following the same safety precautions and cable connection order as described for motorhomes. The process is identical.
Will jumping my RV battery damage my car’s electronics?
If done correctly with proper connections and good quality cables, the risk is minimal. The most common cause of damage is incorrect connection order, especially attaching the final negative clamp to the dead battery.
What if the RV battery is frozen?
Never attempt to jump-start a frozen battery. This can cause an explosion. Allow the battery to thaw completely indoors before attempting any jump-start or charging.
My RV still won’t start after jumping. What else could be wrong?
Other issues could include:
* A completely dead or unserviceable RV battery.
* A faulty starter motor.
* A bad starter solenoid.
* A problem with the RV’s ignition switch.
* A corroded or loose connection on the RV’s battery cables or starter.
* A blown main fuse or circuit breaker in the RV’s electrical system.
How can I prevent my RV battery from dying in the future?
- Regularly check battery charge levels.
- Use a battery monitor.
- Ensure batteries are properly maintained (clean terminals, correct water levels if applicable for flooded batteries).
- Use a trickle charger or solar panels when the RV is not in use.
- Disconnect batteries if the RV will be stored for a long period without a charging source.
- Be mindful of phantom power draws from appliances and electronics.
What’s the difference between a car battery and an RV battery?
Car batteries are designed for high bursts of power to start an engine and are not meant for deep discharging. RV batteries are deep-cycle batteries, built to be discharged and recharged many times without significant damage, providing sustained power for accessories.
Conclusion
Successfully performing an RV battery jump start with your car is a practical skill for RV owners. By following these detailed safety procedures and connection steps, you can effectively get your RV up and running again. Remember to use heavy-duty cables, make connections in the correct order, and prioritize safety by connecting the final negative clamp to a metal chassis point away from the battery. While this method can save you in a pinch, proper battery maintenance and investing in appropriate charging systems will ensure the longevity and reliability of your RV’s power supply.