
Can you remove old tint glue from car windows? Yes, you absolutely can! It might seem like a tough job, but with the right tools and a bit of patience, you can get your car windows looking clear and free of that stubborn sticky residue. This guide will walk you through the entire process, from gathering your supplies to the final polish. We’ll cover everything you need to know to tackle that old tint glue effectively.
Removing old window tint and its accompanying adhesive can feel like wrestling an octopus, but fear not! This comprehensive guide is designed to make the process as smooth and stress-free as possible. We’ll dive deep into the best methods, the essential tools, and common pitfalls to avoid. Whether you’re prepping for new tint or just want a crystal-clear view, this step-by-step walkthrough will help you achieve professional-looking results.
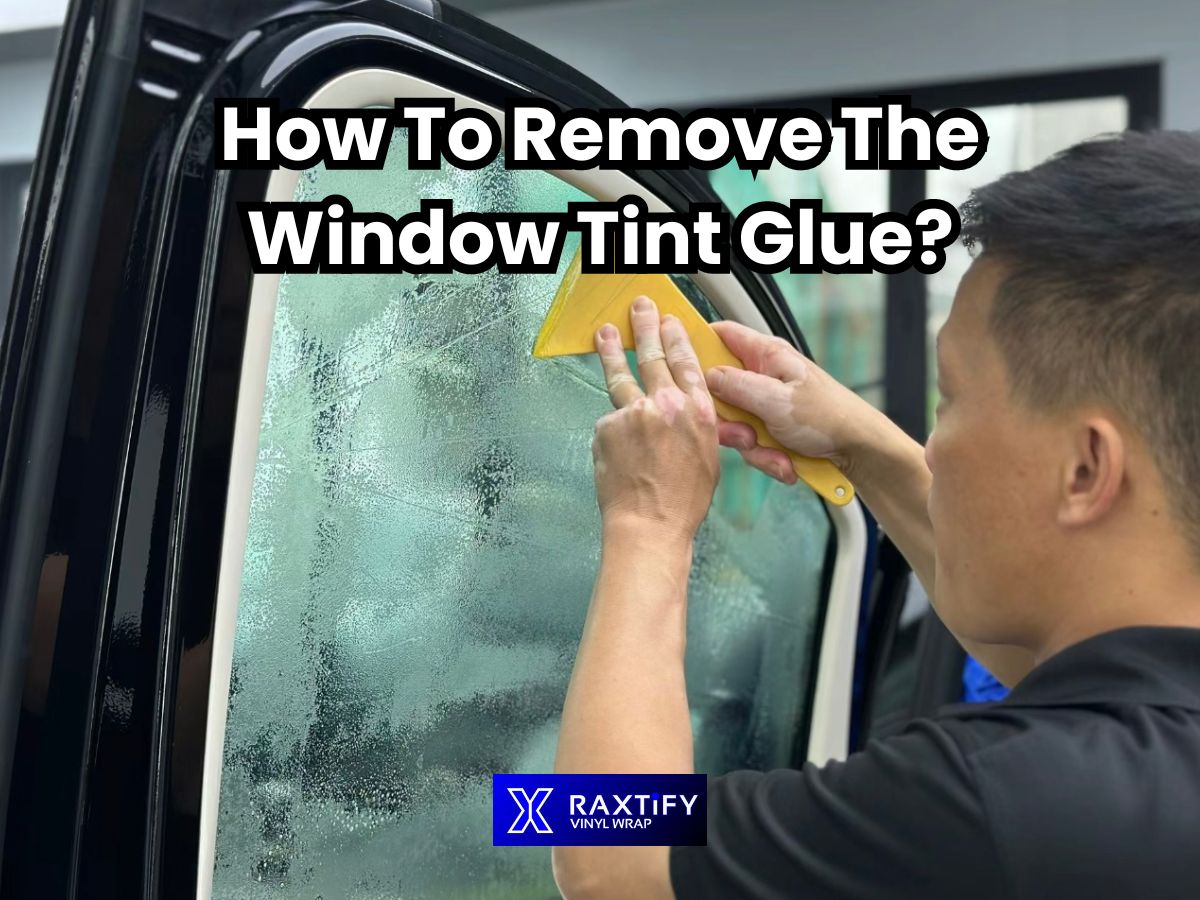
Image Source: raxtify.com
Why Remove Old Window Tint Glue?
There are several reasons why you might need to remove old window tint glue:
- Aesthetics: Old tint can peel, bubble, or fade, making your car look unkempt. The glue residue left behind is even worse for appearance, creating hazy patches and streaks.
- Legality: In some areas, there are laws about the darkness of window tint. If your old tint is too dark, it could lead to tickets.
- Visibility: Damaged or degraded tint can obstruct your view, which is dangerous for driving.
- New Tint Application: If you plan to apply new window tint, the old adhesive must be completely removed for the new film to adhere properly.
Gathering Your Tools and Supplies
Before you start, it’s crucial to have everything you need. This will save you trips to the store and prevent frustration.
Essential Tools
- Heat Gun or Hair Dryer: This is key for softening the old tint and the adhesive. A heat gun is more powerful, but a high-heat hair dryer can also work.
- Razor Blade Scraper or Window Scraper Tool: A new, sharp blade is essential for safely lifting the tint and glue. A plastic scraper is an option, but metal blades are generally more effective for stubborn glue.
- Microfiber Towels: You’ll need plenty of these for cleaning, applying solutions, and drying.
- Spray Bottle: For applying your cleaning solutions.
- Bucket: For warm, soapy water or other cleaning solutions.
- Gloves: To protect your hands from chemicals and sharp blades.
- Safety Glasses: To protect your eyes from flying debris or splashes.
Chemical Solutions and Cleaners
- Ammonia-Free Car Window Cleaner: A good car window cleaner is vital for the final cleaning stages. Ensure it’s ammonia-free, as ammonia can damage tint and some car window films.
- Adhesive Remover / Residue Remover: This is your secret weapon against stubborn glue. Products like Goo Gone, a dedicated adhesive remover, or even isopropyl alcohol can be very effective. A specific residue remover designed for automotive applications is often the best choice.
- Soapy Water: Simple dish soap mixed with warm water can be surprisingly effective for initial cleaning.
Step-by-Step Guide to Removing Tint Glue
Let’s get down to business. This process requires patience and a methodical approach.
Step 1: Preparing the Work Area and Window
- Park your car in a well-lit area, preferably out of direct sunlight. This prevents the solutions from drying too quickly.
- Protect your car’s interior. Lay down towels or drop cloths on your dashboard and seats to catch any dripping solutions or scraped-off material.
- Clean the window exterior. Use a standard car wash soap and water to remove any dirt and grime from the outside of the window. This prevents you from grinding dirt into the glass as you work.
Step 2: Softening the Tint and Adhesive
This is where the heat comes in.
- Apply heat:
- Using your heat gun or hair dryer, set it to a medium or high heat setting.
- Hold the heat source about 4-6 inches away from the window.
- Move the heat gun back and forth across the tint in a consistent pattern. Don’t linger too long in one spot, as excessive heat can damage the glass or surrounding trim.
- The goal is to warm the tint and adhesive until it becomes pliable, making film removal easier. You’ll start to see the tint lifting at the edges.
Step 3: Removing the Window Tint Film
Once the tint is softened, it’s time to start peeling.
- Start peeling:
- Using your fingernail or the edge of a plastic scraper, find a loose edge of the tint, usually a corner.
- Slowly and steadily peel the tint away from the glass.
- As you peel, continue to apply heat with your heat gun or hair dryer to the area you are working on. This keeps the adhesive soft and prevents it from hardening and becoming more difficult to remove.
- Try to pull the tint at a low angle, almost parallel to the glass. This helps to remove larger pieces of the film and minimizes the amount of glue left behind.
- Dealing with stubborn pieces:
- If the tint tears or leaves behind small pieces, don’t panic. Just continue applying heat and carefully scrape those areas with your razor blade.
Step 4: Tackling the Adhesive Residue
This is often the most challenging part. Even after removing the film, a significant amount of sticky residue will likely remain.
- Initial scraping:
- Once the majority of the tint film is off, you’ll be left with a layer of adhesive.
- Apply more heat to the remaining adhesive to soften it.
- Hold your razor blade scraper at a low angle (around 30 degrees) to the glass.
- Gently but firmly scrape away the softened adhesive. Always scrape in one direction.
- Rinse your blade frequently in warm water to keep it clean and effective.
- Using chemical solutions:
- For areas where the razor blade isn’t working well, or to break down the stubborn glue, it’s time for your chemical arsenal.
- Test in an inconspicuous area first: Before applying any chemical to the entire window, test it on a small corner to ensure it doesn’t damage the glass or any surrounding materials.
- Applying the solution: Spray your chosen adhesive remover (like Goo Gone or isopropyl alcohol) generously onto the glue residue. Let it sit for a few minutes to allow it to penetrate and break down the adhesive.
- Scraping with chemicals: After the solution has worked its magic, use your razor blade scraper again. The adhesive should now be much easier to lift.
- Repeat as needed: You might need to repeat the process of applying the chemical and scraping several times for particularly stubborn patches of glue.
- Alternative methods: Some people find success using a mixture of hot water and dish soap, or even a dedicated residue remover spray. A diluted solution of vinegar can also help break down some adhesives.
Table: Chemical Solutions for Tint Glue Removal
| Solution | Pros | Cons | Best For |
|---|---|---|---|
| Goo Gone | Effective at breaking down adhesives, pleasant citrus scent. | Can leave an oily residue that needs cleaning, might require multiple applications. | Stubborn, caked-on glue. |
| Isopropyl Alcohol | Readily available, evaporates cleanly, good disinfectant. | Can be drying to skin, might not be strong enough for very old, hardened glue. | Lighter adhesive residue, final clean-up. |
| Adhesive Remover | Specifically formulated for tough adhesives, often very potent. | Can be harsh chemicals, require good ventilation, may be more expensive. | The most difficult and tenacious glue spots. |
| Soapy Water | Gentle, readily available, helps lubricate for scraping. | Least effective on its own for tough glue, often needs repeated application. | Initial cleaning, light residue. |
| Vinegar (diluted) | Natural, can help break down some adhesives. | Strong smell, may not be effective on all types of glue. | Mild residue, as a secondary option. |
Step 5: Cleaning the Window Thoroughly
Once the glue is off, you’ll likely have some streaks or hazy spots left.
- Initial rinse: Use a clean microfiber towel and warm water to wipe down the window and remove any loosened glue or chemical residue.
- Apply car window cleaner: Spray your ammonia-free car window cleaner generously onto the glass.
- Wipe and buff: Use a clean, dry microfiber towel to wipe the window clean. For best results, use an overlapping pattern and a clean section of the towel for each pass. You might need to buff the window a few times to achieve a streak-free shine.
- Check for missed spots: Look at the window from different angles in good light to ensure you haven’t missed any small patches of glue or streaks. Repeat the cleaning process if necessary.
Step 6: Cleaning the Interior Window (If Tinted)
If the tint was on the inside of the car, you’ll need to repeat some of these steps on the interior glass.
- Protect the interior: Ensure your dashboard and seats are well-protected.
- Use appropriate solutions: Be cautious with chemicals on interior surfaces, as they can sometimes damage trim or upholstery. Always test in an inconspicuous area.
- Ventilation is key: Ensure good ventilation when working inside the car, especially if using stronger chemical cleaners.
- Follow similar steps: Use heat to soften, then a scraper (carefully!) and your chosen adhesive remover or alcohol to tackle the glue. Finish with an interior-specific glass cleaner.
Pro Tips for a Smoother Process
- Patience is paramount: This isn’t a race. Rushing can lead to scratches or incomplete removal.
- Sharp blades are your friend: A dull razor blade will push the glue around and can cause scratches. Replace your blades frequently.
- Work in sections: Don’t try to tackle the entire window at once. Work on one manageable section at a time.
- Keep it wet: For scraping, keeping the area slightly wet with your cleaning solution or soapy water can help the blade glide more smoothly and prevent scratches.
- Don’t over-apply heat: Too much heat can crack the glass, especially on colder days. Aim for warm, not scorching hot.
- Consider specialized tools: While not strictly necessary, a dedicated film removal tool or a special tint scraper can make the job easier. Some detailers use a steam cleaner for particularly tough jobs, but this requires more specialized equipment.
- Have plenty of towels: You’ll use more towels than you think.
What to Avoid
- Using abrasive cleaners or pads: Steel wool, scouring pads, or harsh abrasive cleaners will scratch your glass.
- Using ammonia-based cleaners on the tint: If you’re attempting to remove tint with the adhesive still on, ammonia can react negatively with certain tint films. It’s best to stick to ammonia-free products for any glass cleaning that might interact with the tint.
- Using excessive force: This can lead to scratches on the glass. Let the heat and chemical solutions do most of the work.
- Working in direct sunlight or extreme heat/cold: This can cause your solutions to dry too quickly or make the glass too brittle.
Frequently Asked Questions (FAQ)
Q1: Can I remove window tint glue with just soapy water?
While soapy water can help with initial cleaning and lubrication, it’s generally not strong enough on its own to remove stubborn, old window tint glue. You will likely need an adhesive remover or isopropyl alcohol in conjunction with scraping.
Q2: What is the best product to remove tint glue?
Many effective products exist. Dedicated adhesive remover sprays like Goo Gone or specialized automotive residue remover products are highly recommended. Isopropyl alcohol is also a common and effective choice, especially for lighter residue or as a follow-up cleaner.
Q3: Will scraping damage my car window?
Scraping can damage your window if done improperly. Always use a sharp razor blade held at a low angle (around 30 degrees) and keep the surface lubricated with a cleaning solution. Avoid using dull blades or excessive force, as these are the most common causes of scratches.
Q4: How long does it take to remove tint glue?
The time it takes can vary greatly depending on the age and type of tint, the adhesive used, and your experience. It can take anywhere from 30 minutes to several hours per window for very stubborn glue. Patience is key!
Q5: Can I use a razor blade on the inside of my car windows?
Yes, you can, but you must be extra careful. The interior glass is often more accessible, but you also need to protect your car’s interior from chemicals and scraped-off residue. Use your razor blade with the same caution as you would on the exterior.
Q6: What is a detailing spray and can it help with tint glue?
A detailing spray is generally a quick-drying cleaner used for final touches on a car’s exterior or interior. While it’s excellent for making glass shine after all the glue is removed, it’s typically not strong enough to break down or remove the actual tint adhesive itself.
Q7: My tint film tore and left a lot of glue. What’s the best approach?
If your tint film tears, focus on softening the remaining adhesive with your heat gun or hair dryer. Then, use your razor blade scraper at a low angle to lift the glue. Apply your chosen adhesive remover to help break down any particularly sticky areas before scraping. This is a common scenario, and repeated application of heat and cleaner is usually effective.
By following these steps and utilizing the right tools, you can successfully remove even the most stubborn window tint glue, leaving your car windows crystal clear and ready for whatever you have planned next. Happy detailing!