
Image Source: cdn-hmghd.nitrocdn.com
Protecting Your Ride: How Often to Condition Leather Car Seats
How often should you condition leather car seats? You should aim to condition your leather car seats every 3-6 months, depending on your vehicle’s environment and usage. This regular care is crucial for maintaining the supple texture, preventing cracks, and preserving the overall appearance of your leather upholstery, contributing significantly to leather seat longevity tips.
Leather car seats are a hallmark of automotive luxury. They offer a comfortable and sophisticated driving experience. However, like any natural material, leather requires consistent care to remain in pristine condition. Neglecting this can lead to premature wear, dryness, and unsightly damage. This comprehensive guide will delve into the intricacies of leather car seat care frequency, providing you with a detailed leather seat maintenance schedule and expert advice on how to treat leather car seats to ensure their beauty and durability for years to come. We will also explore the best time to condition leather seats, the importance of leather upholstery cleaning and conditioning, and essential leather protection for car interiors.
Why Conditioning Your Leather Seats Matters
Leather is a natural product derived from animal hides. It contains natural oils that keep it soft, flexible, and resistant to drying out. Over time, these oils can diminish due to exposure to sunlight, heat, and even the friction of everyday use. When these oils deplete, the leather begins to lose its suppleness. It can become stiff, brittle, and more prone to cracking and tearing.
Conditioning acts as a replenishing agent. It introduces new oils and emollients back into the leather, restoring its moisture balance. This process not only keeps the leather soft and supple but also creates a protective barrier against environmental damage. Think of it like moisturizing your skin; without it, skin becomes dry and aged. The same principle applies to your car’s leather seats.
Factors Influencing Conditioning Frequency
The ideal leather seat conditioning intervals aren’t a one-size-fits-all answer. Several variables will dictate how often you should apply a leather conditioner:
- Climate: If you live in a hot, dry climate, or spend a lot of time in direct sunlight, your leather will dry out faster. This means you might need to condition more frequently, perhaps every 3-4 months. Conversely, cooler, more humid climates may allow for longer intervals, closer to 6 months.
- Usage: How often are your seats used? Do you have children or pets that contribute to wear and tear? Heavy usage, spills, and constant exposure to body oils can accelerate the breakdown of the leather’s natural oils. Seats used daily or frequently by multiple people might benefit from conditioning every 3-4 months.
- Sun Exposure: Direct sunlight is a major enemy of leather. UV rays can break down the leather’s structure and strip away its natural moisture. Cars parked outdoors for extended periods will require more frequent conditioning than those kept in a garage.
- Type of Leather: Different types of leather finishes have varying needs.
- Aniline and Semi-Aniline Leather: These are more natural and porous, absorbing conditioners well but also being more susceptible to staining and drying. They typically benefit from more frequent conditioning.
- Pigmented (Protected) Leather: This is the most common type in cars. It has a protective coating, making it more durable and resistant to spills and fading. While it still needs conditioning, it might not require it as often as more natural finishes.
- Nubuck and Suede: These are not typically conditioned in the same way as smooth leather. They require specialized cleaning and protection products. This guide focuses on smooth leather upholstery.
- Previous Care: If the leather has been neglected and is already dry or showing signs of wear, it will need more intensive conditioning and possibly more frequent applications initially to restore its suppleness.
Establishing Your Leather Seat Maintenance Schedule
A good starting point for a leather seat maintenance schedule is to aim for conditioning every 3-6 months. You can adjust this based on the factors mentioned above.
Here’s a sample schedule and how to monitor your leather:
Quarterly Check (Every 3 Months):
- Visual Inspection: Look for any signs of dryness, dullness, or minor scuffs.
- Feel Test: Touch the leather. Does it feel dry, stiff, or rough? Or is it still soft and supple?
- Water Drop Test: Place a tiny drop of water on an inconspicuous area. If it soaks in quickly, the leather is likely dry and needs conditioning. If it beads up, it’s still well-protected.
Bi-Annual Conditioning (Every 6 Months):
- Routine Conditioning: If your leather passes the quarterly checks and feels generally good, a bi-annual conditioning is likely sufficient. This is a good general guideline for most vehicles with moderate usage and exposure.
More Frequent Conditioning (Every 3-4 Months):
- Harsh Climates: Vehicles in deserts, areas with extreme heat, or prolonged sun exposure.
- Heavy Usage: Cars used daily by families, with frequent passengers, or those with pets.
- Prior Neglect: If the leather is already showing signs of dryness or minor cracking, more frequent conditioning might be needed to bring it back to health.
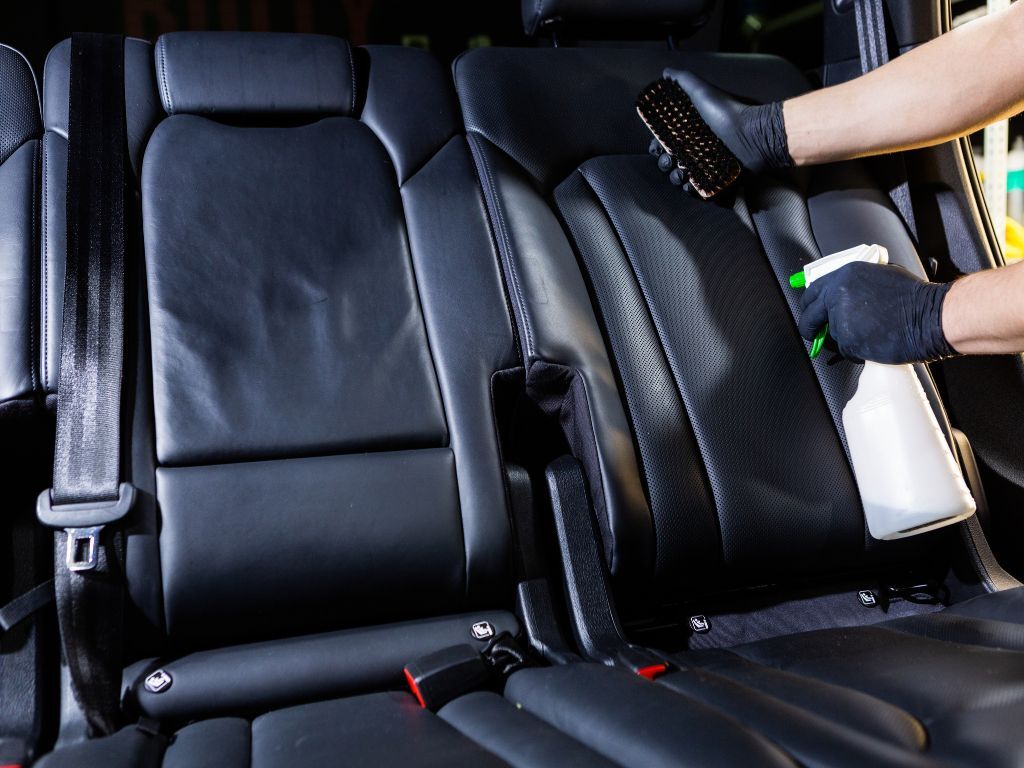
The Importance of Cleaning Before Conditioning
It is vital to clean your leather seats thoroughly before applying any conditioner. Applying conditioner over dirt, grime, or spills will essentially seal those contaminants into the leather, potentially causing further damage and making them harder to remove later. This step is a critical part of effective leather upholstery cleaning and conditioning.
Steps for Proper Cleaning:
- Vacuum Thoroughly: Use a soft brush attachment to remove loose dirt, dust, and debris from all crevices, seams, and surfaces.
- Use a Dedicated Leather Cleaner: Never use harsh household cleaners, all-purpose sprays, or abrasive cloths on leather. Opt for a pH-balanced leather cleaner specifically designed for automotive interiors.
- Apply Cleaner to a Microfiber Cloth: Dampen a clean, soft microfiber cloth with the leather cleaner. Avoid spraying the cleaner directly onto the leather, as this can lead to over-saturation.
- Gentle Wiping: Gently wipe down the leather surfaces. Work in small sections, moving the cloth in a consistent direction.
- Address Stubborn Spots: For tougher stains or grime, you may need to gently agitate the area with a soft-bristled leather cleaning brush. Use light pressure and circular motions.
- Wipe Away Residue: Use a separate, clean, damp microfiber cloth to wipe away any cleaner residue.
- Dry the Leather: Allow the leather to air dry completely. You can speed this up with a clean, dry microfiber cloth. Ensure the leather is entirely dry before moving to the conditioning step.
Selecting the Right Leather Conditioner
Not all leather conditioners are created equal. Choosing the right product is essential for effective leather car seat care.
What to Look for in a Leather Conditioner:
- pH-Balanced: The conditioner should have a pH level similar to that of natural leather to avoid damage.
- Penetrating Oils: Look for conditioners containing natural oils like lanolin, neatsfoot oil, or mink oil, which help to restore the leather’s suppleness.
- UV Protection: Many quality conditioners include UV inhibitors to help protect the leather from sun damage.
- Non-Greasy Formula: A good conditioner should absorb into the leather without leaving a greasy residue that can attract dust or make the seats slippery.
- Brand Reputation: Research reputable brands known for their automotive leather care products.
When to Apply Leather Conditioner: The Best Time to Condition Leather Seats
The best time to condition leather seats is after a thorough cleaning, as detailed above. However, you also need to consider environmental factors for application.
Ideal Application Conditions:
- Moderate Temperature: Aim for a temperature between 60°F and 80°F (15°C and 27°C). Very cold temperatures can make the conditioner stiff and difficult to work with, while very hot temperatures can cause it to dry too quickly, preventing proper absorption.
- Out of Direct Sunlight: Apply the conditioner in a shaded area or a garage. Direct sunlight can cause the conditioner to dry too fast and potentially lead to splotchiness.
- Clean Environment: Ensure the area you are working in is clean to avoid transferring new dirt onto the conditioned leather.
The Conditioning Process: A Step-by-Step Guide
Once your seats are clean and dry, and you’ve chosen the right conditioner, you’re ready to apply it. This is a core part of your car leather care routine.
Steps for Conditioning:
- Test in an Inconspicuous Area: Before applying to the entire seat, test the conditioner on a small, hidden spot (e.g., under the seat or on the side bolster). This ensures it doesn’t alter the leather’s color or texture in an undesirable way.
- Apply a Small Amount: Pour a small amount of conditioner onto a clean, soft microfiber applicator pad or cloth. You don’t need to drench the leather; a little goes a long way.
- Work in Sections: Apply the conditioner to the seats in small, manageable sections. Use gentle, circular motions to work the product into the leather. Ensure even coverage.
- Allow Absorption: Let the conditioner sit on the leather for the time recommended by the product manufacturer. This is typically 5-15 minutes, allowing the oils to penetrate the leather.
- Buff Off Excess: Use a separate, clean, dry microfiber cloth to gently buff off any excess conditioner. This removes any residue and helps to restore the leather’s natural sheen.
- Repeat if Necessary: For very dry or neglected leather, you might need to apply a second thin coat after the first has been absorbed and buffed. However, avoid over-conditioning, which can make the leather feel greasy or weaken it.
Advanced Leather Protection for Car Interiors
Beyond regular conditioning, consider these additional steps for comprehensive leather protection for car interiors:
- Leather Sealants/Protectants: After conditioning, some enthusiasts apply a dedicated leather sealant or protectant. These products create an additional barrier against spills, stains, UV rays, and abrasion. Look for water-based, breathable formulas.
- Regular Wipe-Downs: Keep a microfiber cloth handy for quick wipe-downs of spills or dust between conditioning sessions.
- Avoid Harsh Chemicals: Never use harsh cleaning agents, silicone-based products, or furniture polish on your leather car seats. They can strip natural oils, damage the protective coating, or leave a greasy film.
- Parking Strategies: Whenever possible, park your car in a shaded area or use a sunshade to minimize direct UV exposure.
- Prompt Spill Cleanup: Address spills immediately. Blot them gently with a clean, dry cloth. Avoid rubbing, as this can spread the stain and push it deeper into the leather.
Common Mistakes to Avoid in Your Car Leather Care Routine
Even with the best intentions, some common pitfalls can hinder your efforts to maintain leather seats. Be mindful of these in your car leather care routine:
- Using the Wrong Products: As mentioned, household cleaners or generic “leather” products not designed for automotive use can cause significant damage.
- Over-Conditioning: Too much of a good thing can be bad. Over-conditioning can clog the leather’s pores, make it feel greasy, and attract more dirt.
- Under-Conditioning: Infrequent conditioning is the leading cause of dry, cracked leather.
- Skipping the Cleaning Step: Applying conditioner to dirty leather is counterproductive.
- Using Abrasive Tools: Stiff brushes or rough cloths can scratch or damage the leather’s surface.
- Ignoring the Edges and Seams: These areas are often more prone to wear and drying. Ensure they receive adequate attention during cleaning and conditioning.
How Often to Condition Leather Car Seats: A Summary Table
To help visualize your leather seat maintenance schedule, here’s a helpful table:
| Condition of Leather | Recommended Conditioning Frequency | Notes |
|---|---|---|
| New, well-maintained | Every 6 months | Routine maintenance in moderate climates. |
| Slightly dry, dull | Every 4-5 months | Begins to lose suppleness, may benefit from more frequent care. |
| Noticeably dry, stiff | Every 3-4 months | Shows signs of aging, needs regular replenishment of oils. |
| Exposed to harsh sun/heat | Every 3-4 months | Climate demands more frequent protection against drying. |
| Heavy daily use | Every 3-4 months | Increased wear and tear necessitates more frequent maintenance. |
| Showing minor cracking | Every 3 months (initially) | Intensive care needed to restore suppleness and prevent further damage. |
Frequently Asked Questions (FAQ)
Q1: Can I use baby wipes or disinfectant wipes on my leather car seats?
A1: Absolutely not. Baby wipes and disinfectant wipes often contain alcohol or harsh chemicals that can strip the natural oils from leather, dry it out, and damage its protective coating. Always use products specifically formulated for automotive leather care.
Q2: How do I treat a minor scratch on my leather car seat?
A2: For very light surface scratches, sometimes gentle buffing with a clean microfiber cloth can make them less visible. For deeper scratches, specialized leather repair kits might be necessary, or you may need to consult a professional auto detailer. Conditioning can also help to improve the appearance of minor imperfections by keeping the leather supple.
Q3: Is it okay to condition my leather seats immediately after cleaning?
A3: Yes, it’s ideal. After you have thoroughly cleaned and dried your leather seats, applying conditioner is the next crucial step. Ensure the leather is completely dry before conditioning to prevent trapping moisture.
Q4: Will conditioning make my leather seats slippery?
A4: A high-quality leather conditioner, when applied correctly and buffed off properly, should not make your seats slippery. It should absorb into the leather, leaving it soft and supple with a natural feel. If a product leaves your seats feeling greasy or slippery, it’s likely not the right product, or too much was applied.
Q5: My car is always parked outside. How often should I condition the leather seats?
A5: If your car is consistently exposed to direct sunlight and heat, you should condition your leather seats more frequently, ideally every 3-4 months. The sun’s UV rays are detrimental to leather, drying it out and causing it to fade and crack.
Conclusion
Maintaining the luxurious feel and appearance of your leather car seats is an achievable goal with a consistent and informed approach to leather car seat care. By establishing a leather seat maintenance schedule that aligns with your vehicle’s environment and usage, and by committing to regular leather upholstery cleaning and conditioning, you can significantly enhance your leather seat longevity tips. Remember, preventative care is always more effective and less costly than repair. So, invest a little time and the right products into your car leather care routine, and your leather seats will continue to provide comfort and style for many miles to come, ensuring optimal leather protection for car interiors.